Jira integration
PushFeedback creates Jira issues from user feedback using Jira Cloud Automation or Jira Data Center Automations. Each feedback submission becomes a trackable issue on your board.
Prerequisites
Before you begin, ensure you have:
- A PushFeedback account. If you don't have one, sign up for free.
- A project created in your PushFeedback dashboard. If you haven't created one yet, follow the steps in the Quickstart guide.
- A Jira workspace (Cloud or Data Center) with access to Automation options.
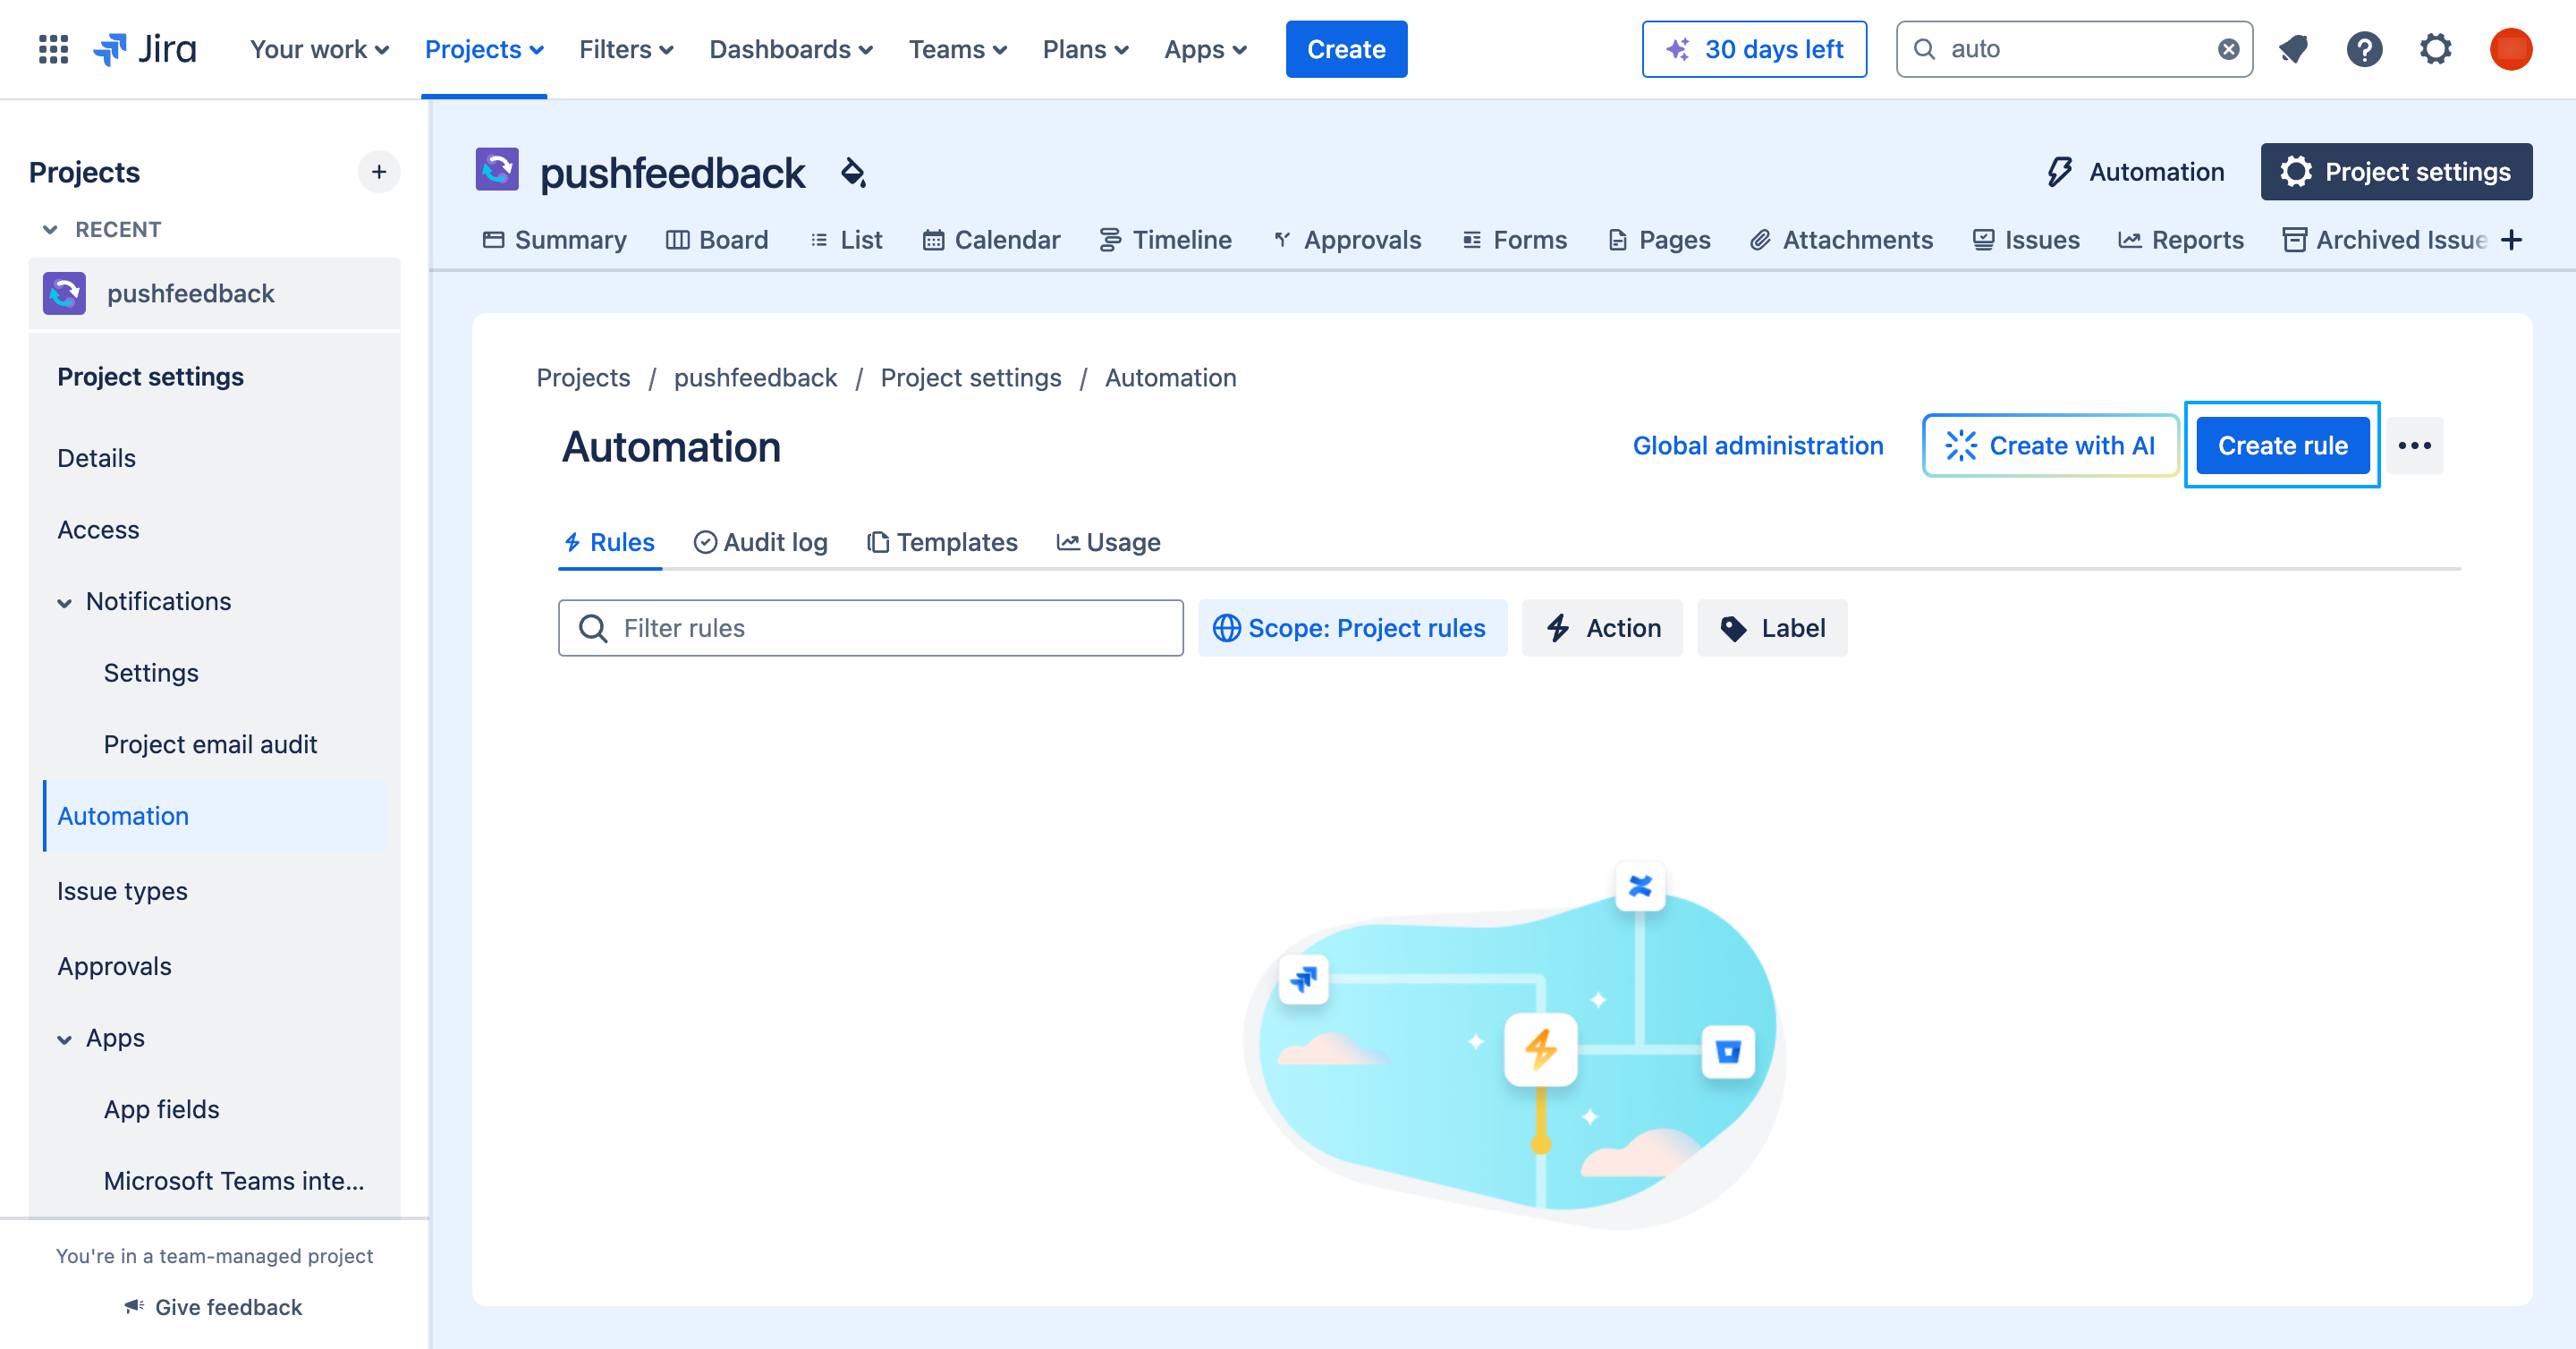
1. Configure Jira automations
Create the automation rule
-
Go to Project settings in your Jira project.
-
Navigate to Automation under Project settings.
-
Click Create rule:
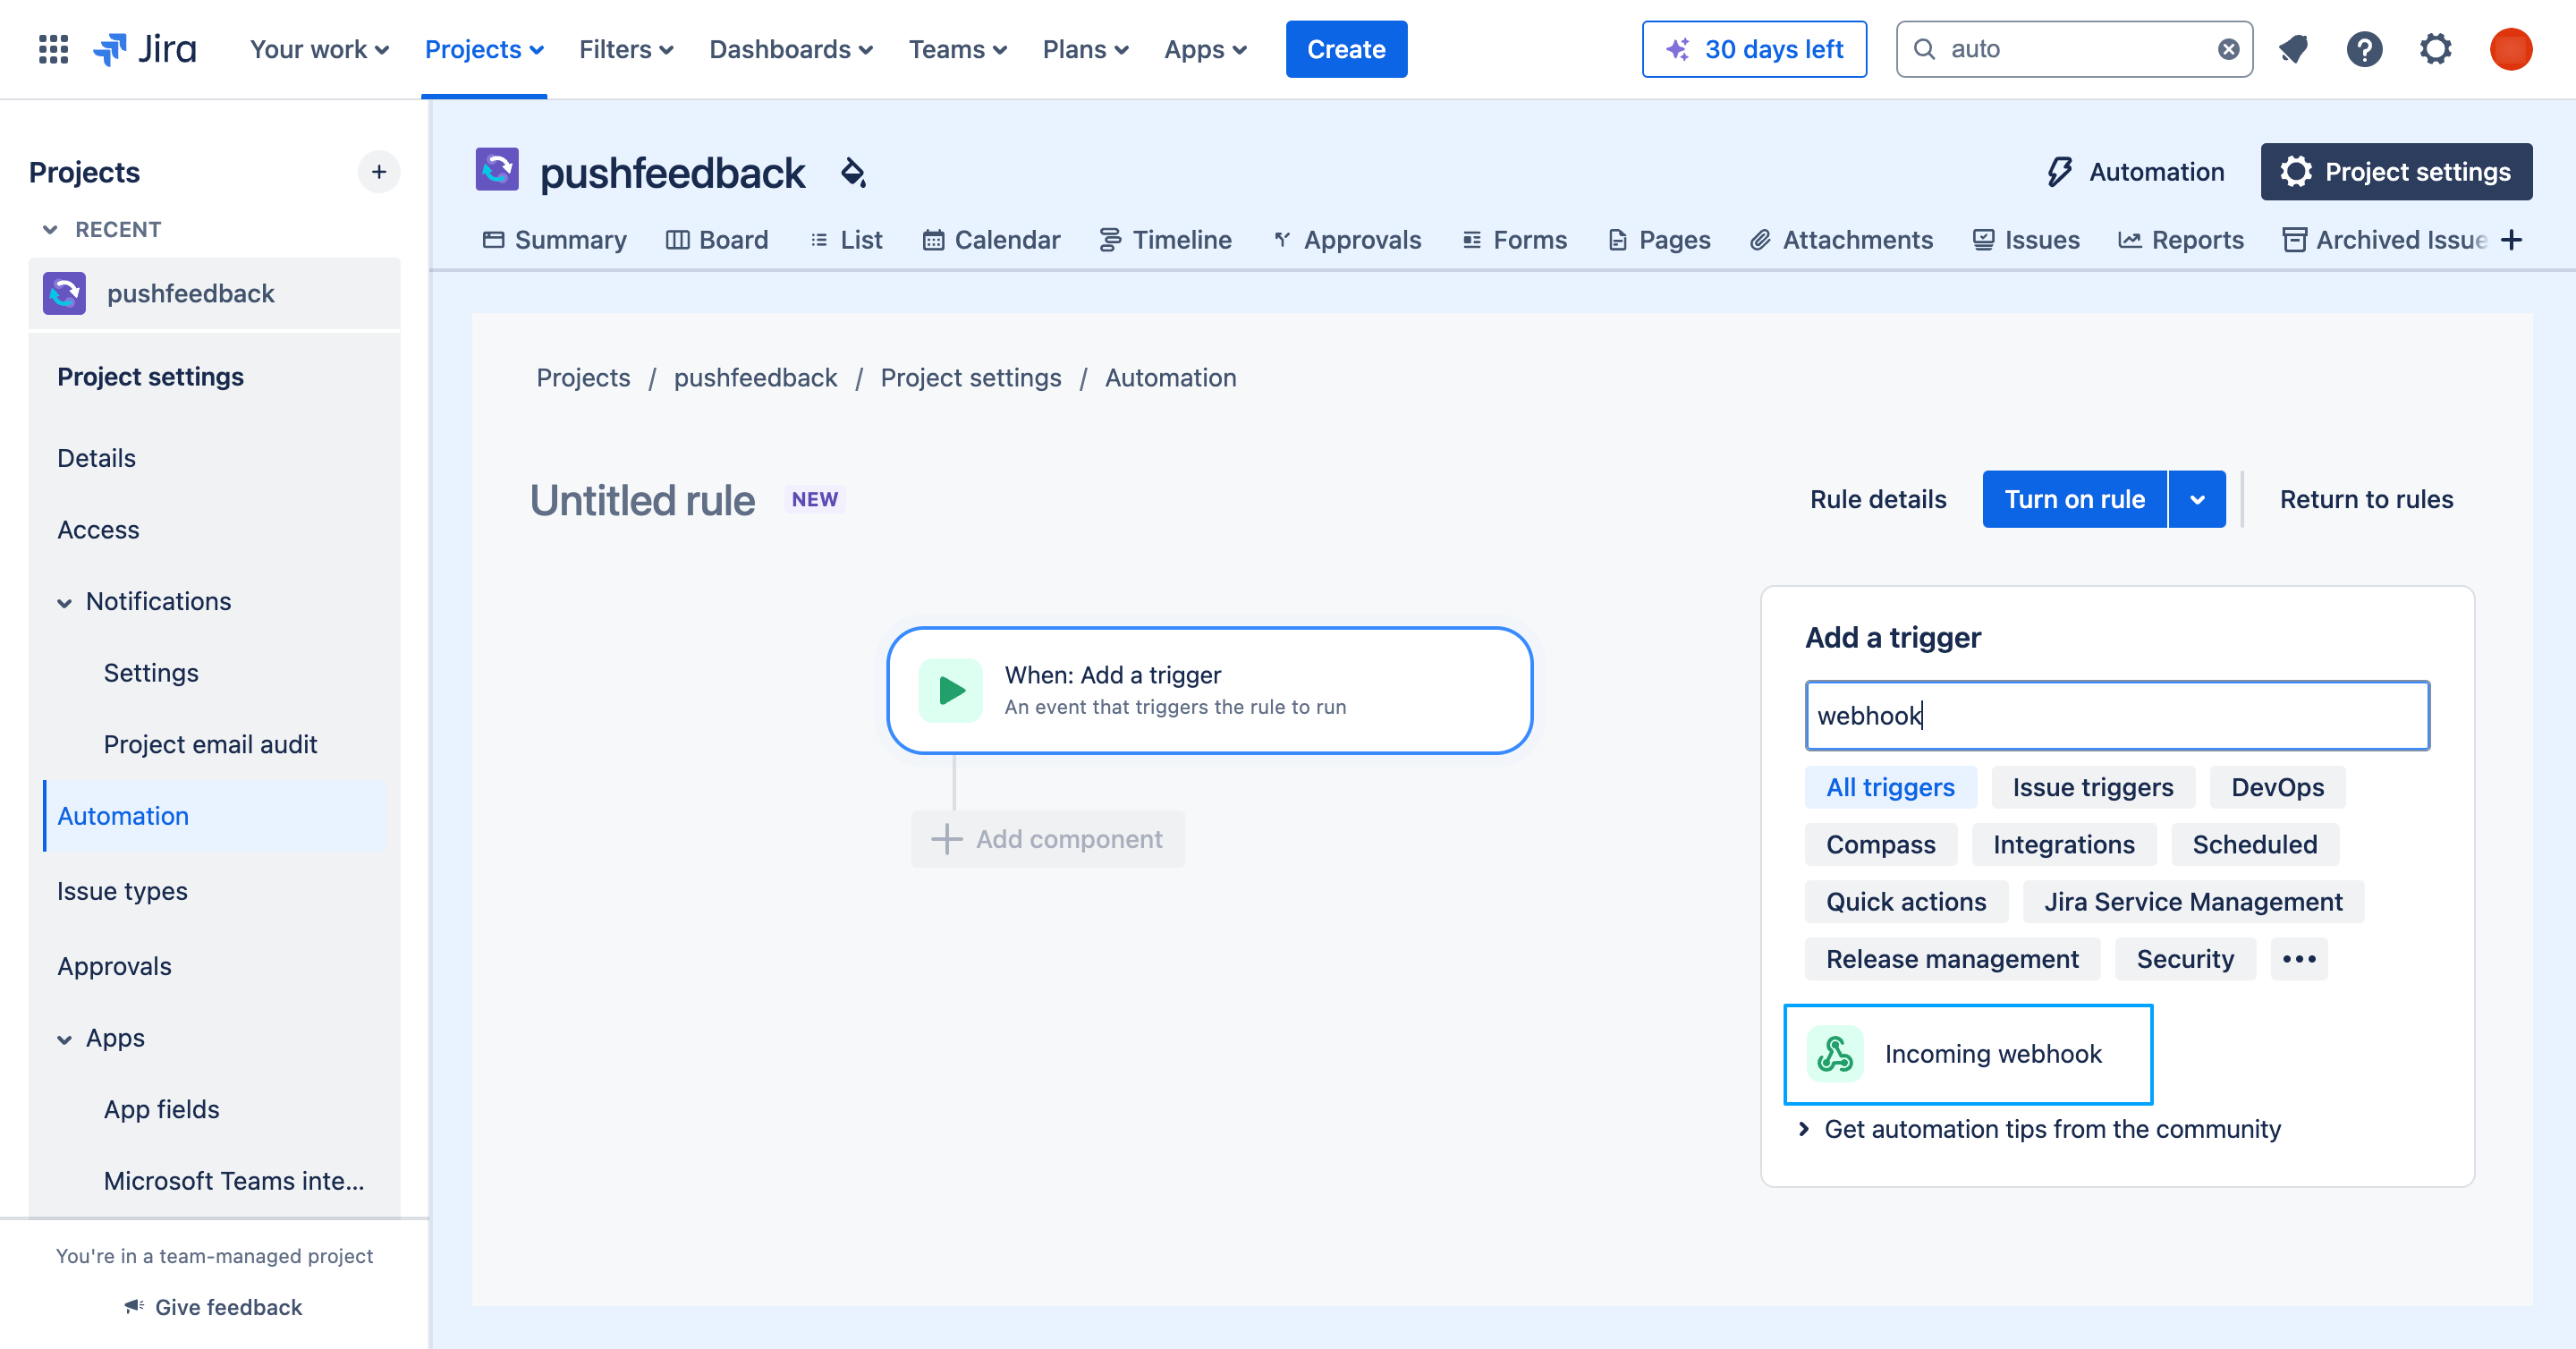
Configure the automation rule
-
Choose the Incoming webhook trigger:
-
Click Next.
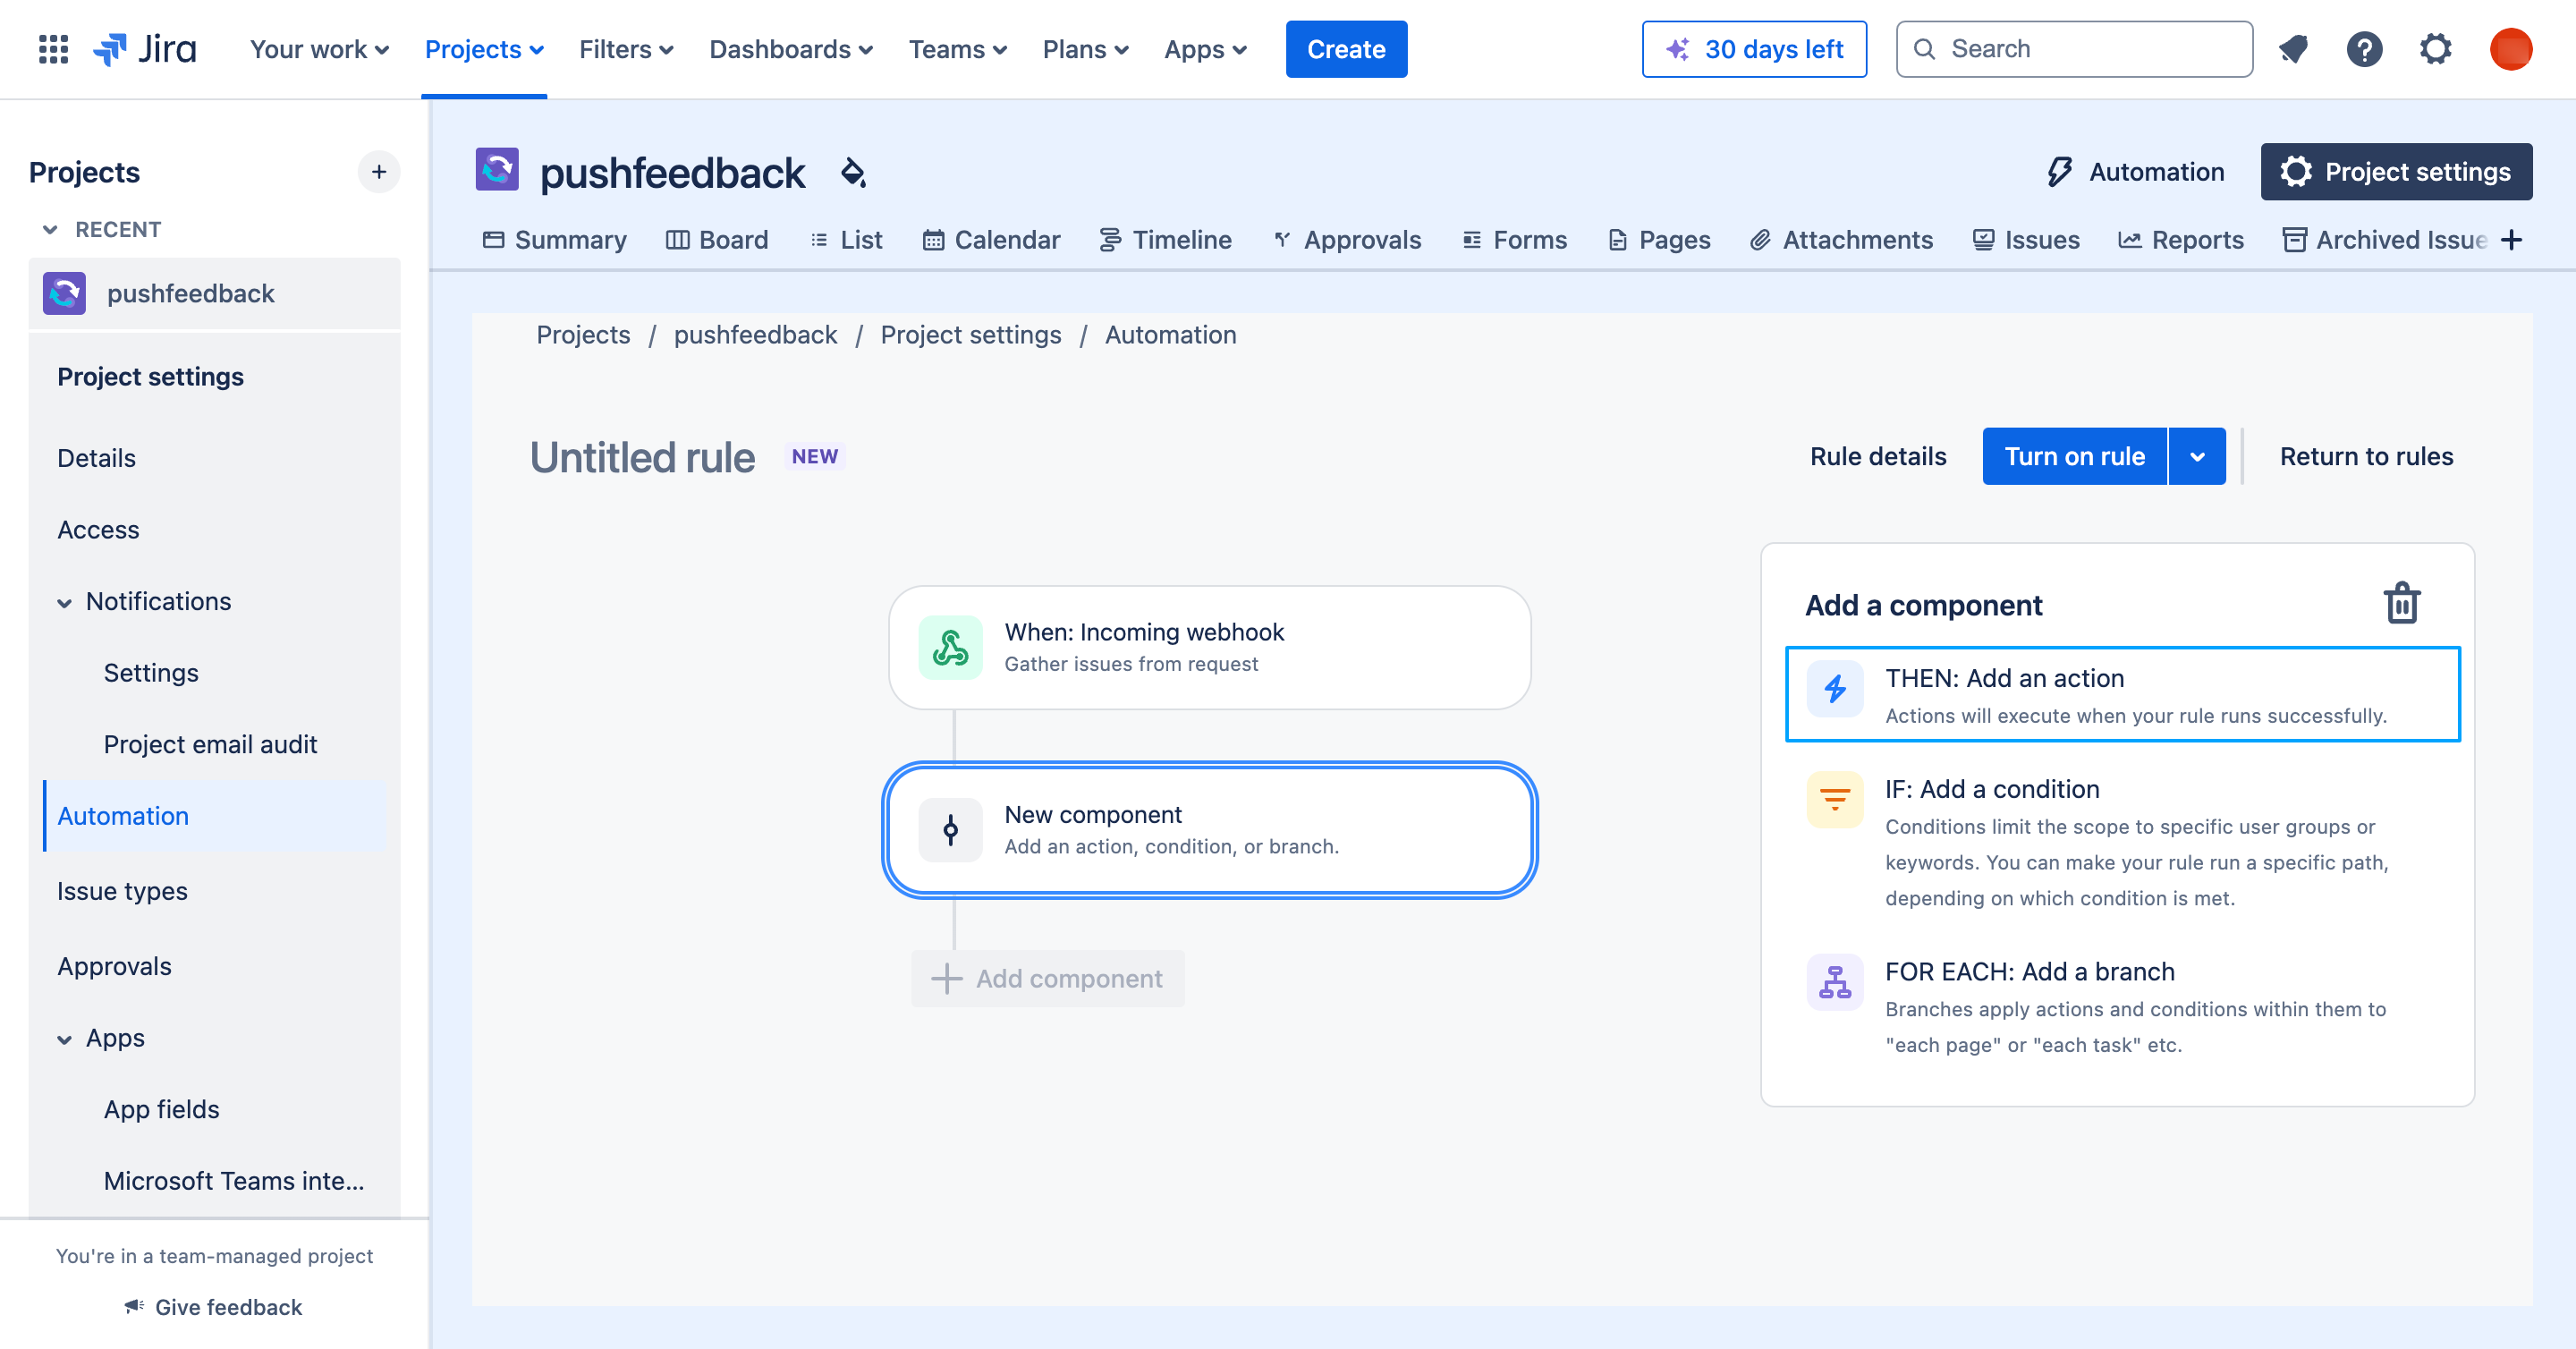
-
Create a Then component:
-
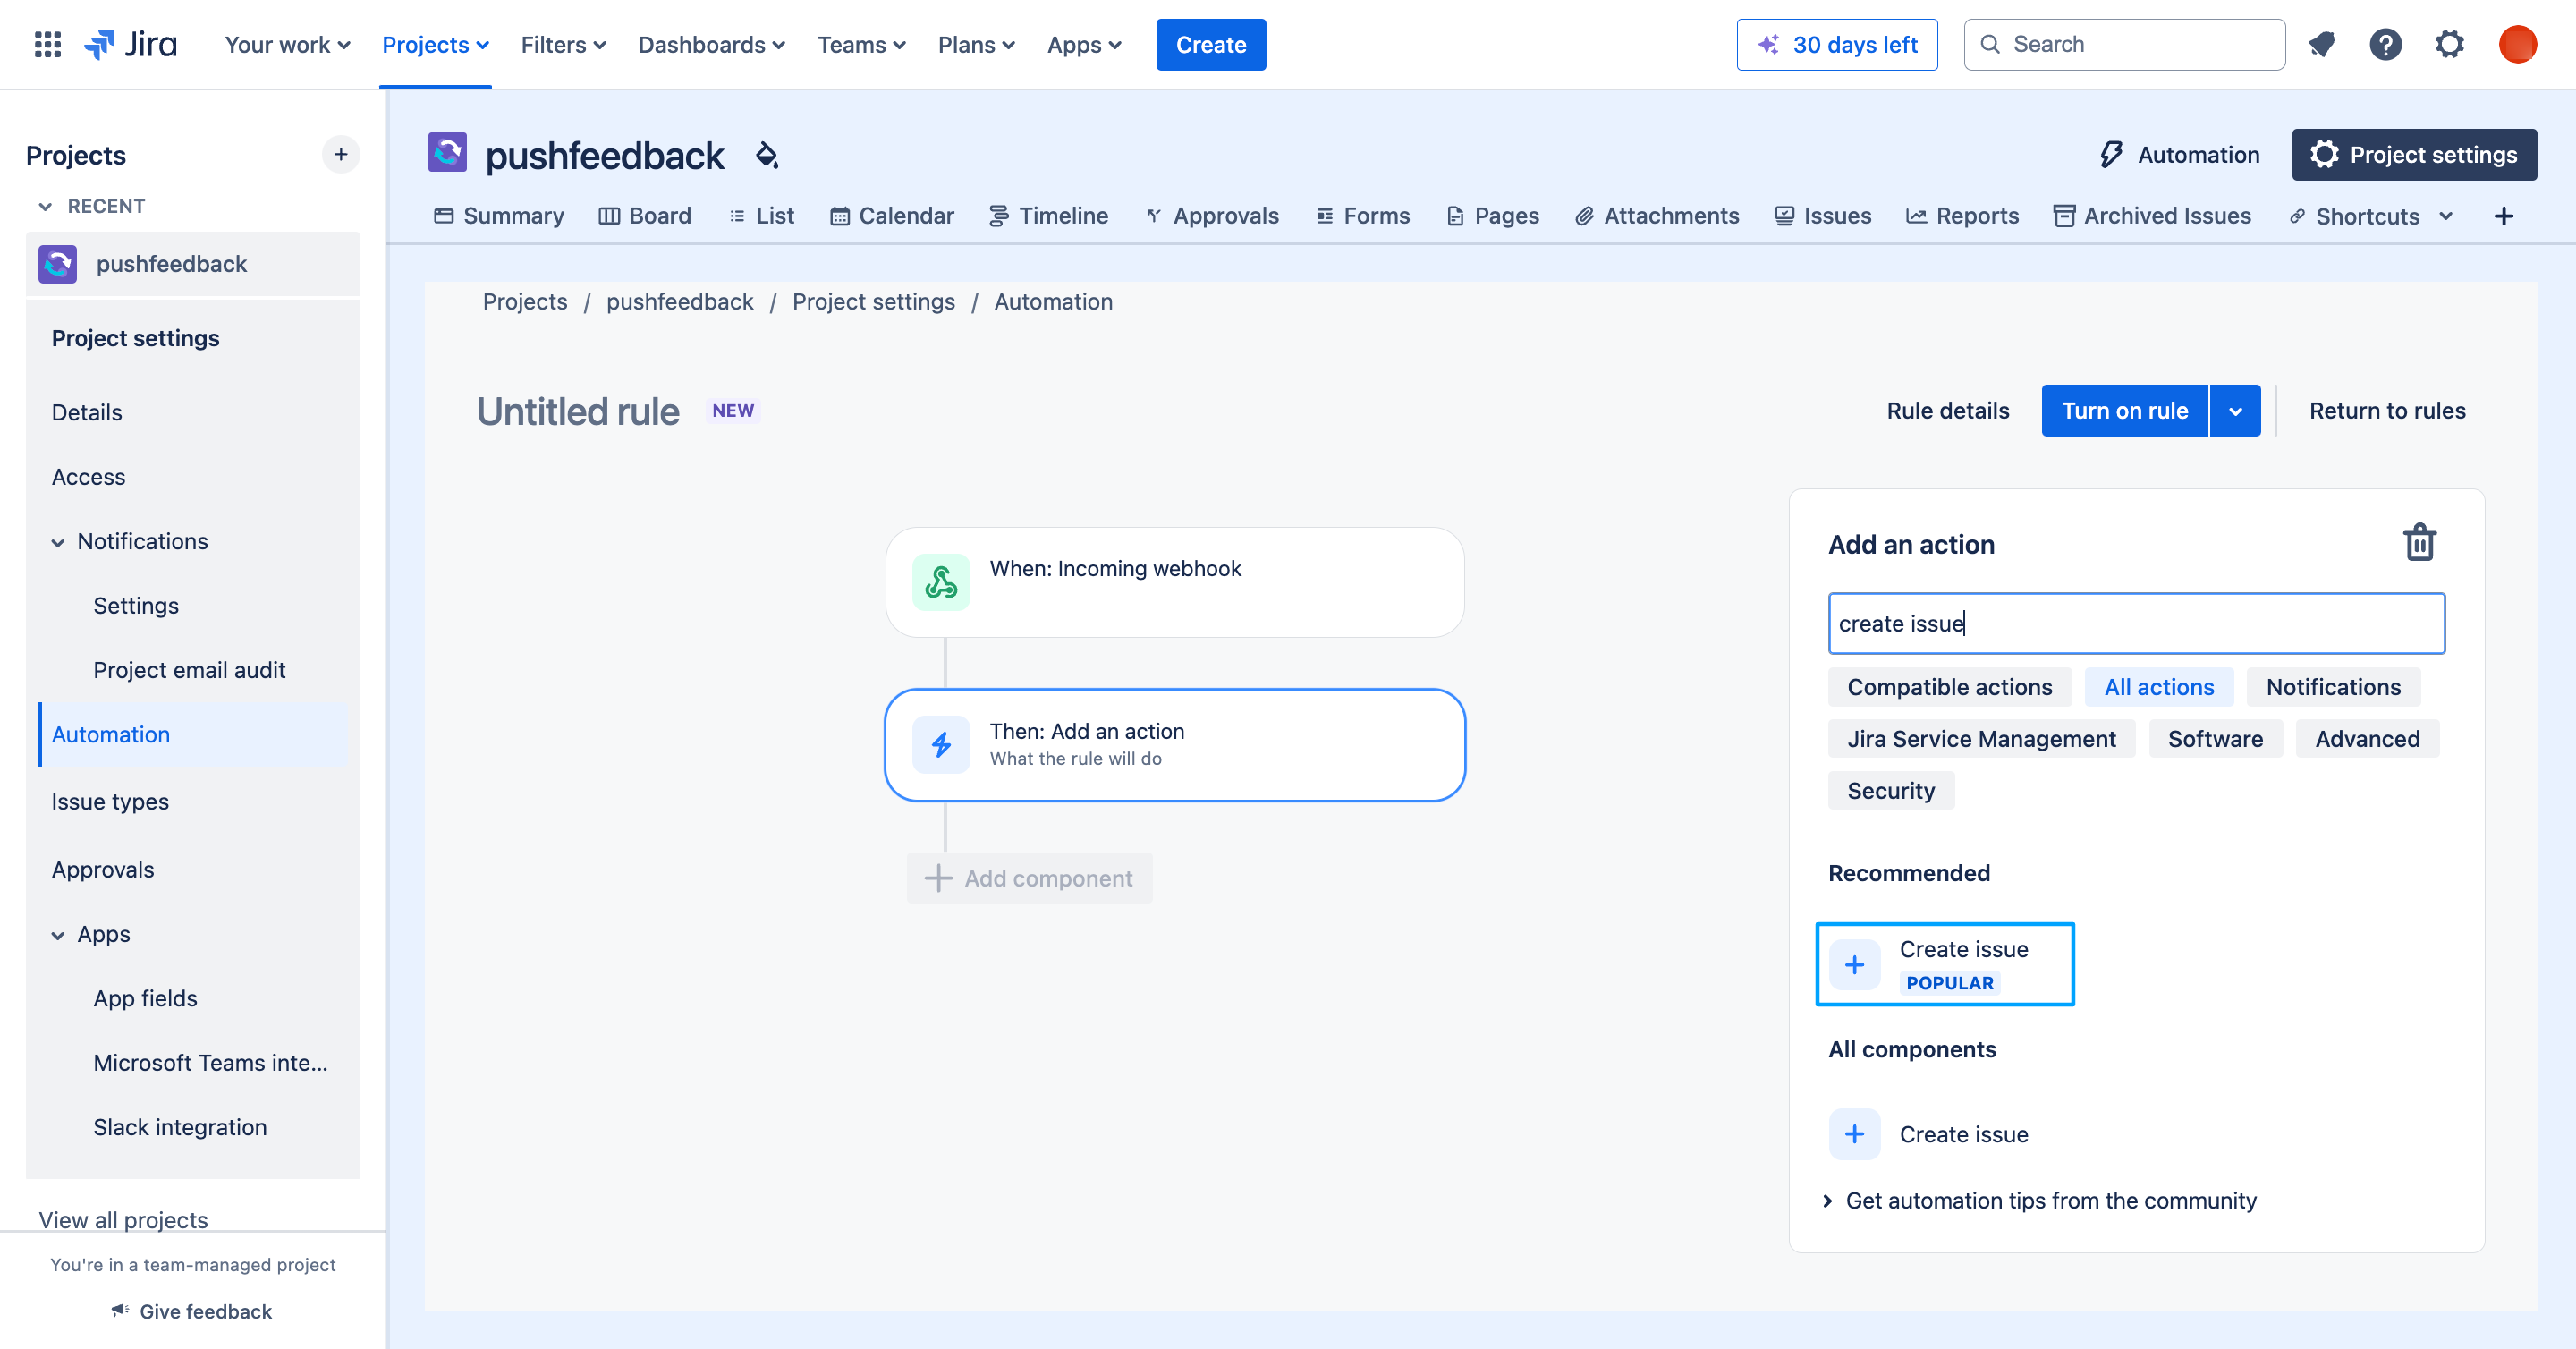
Configure the Then component to Create work item:
 tip
tipIf you don't see the Create work item component, ensure All actions is marked.
-
Configure the Create work item action as follows:
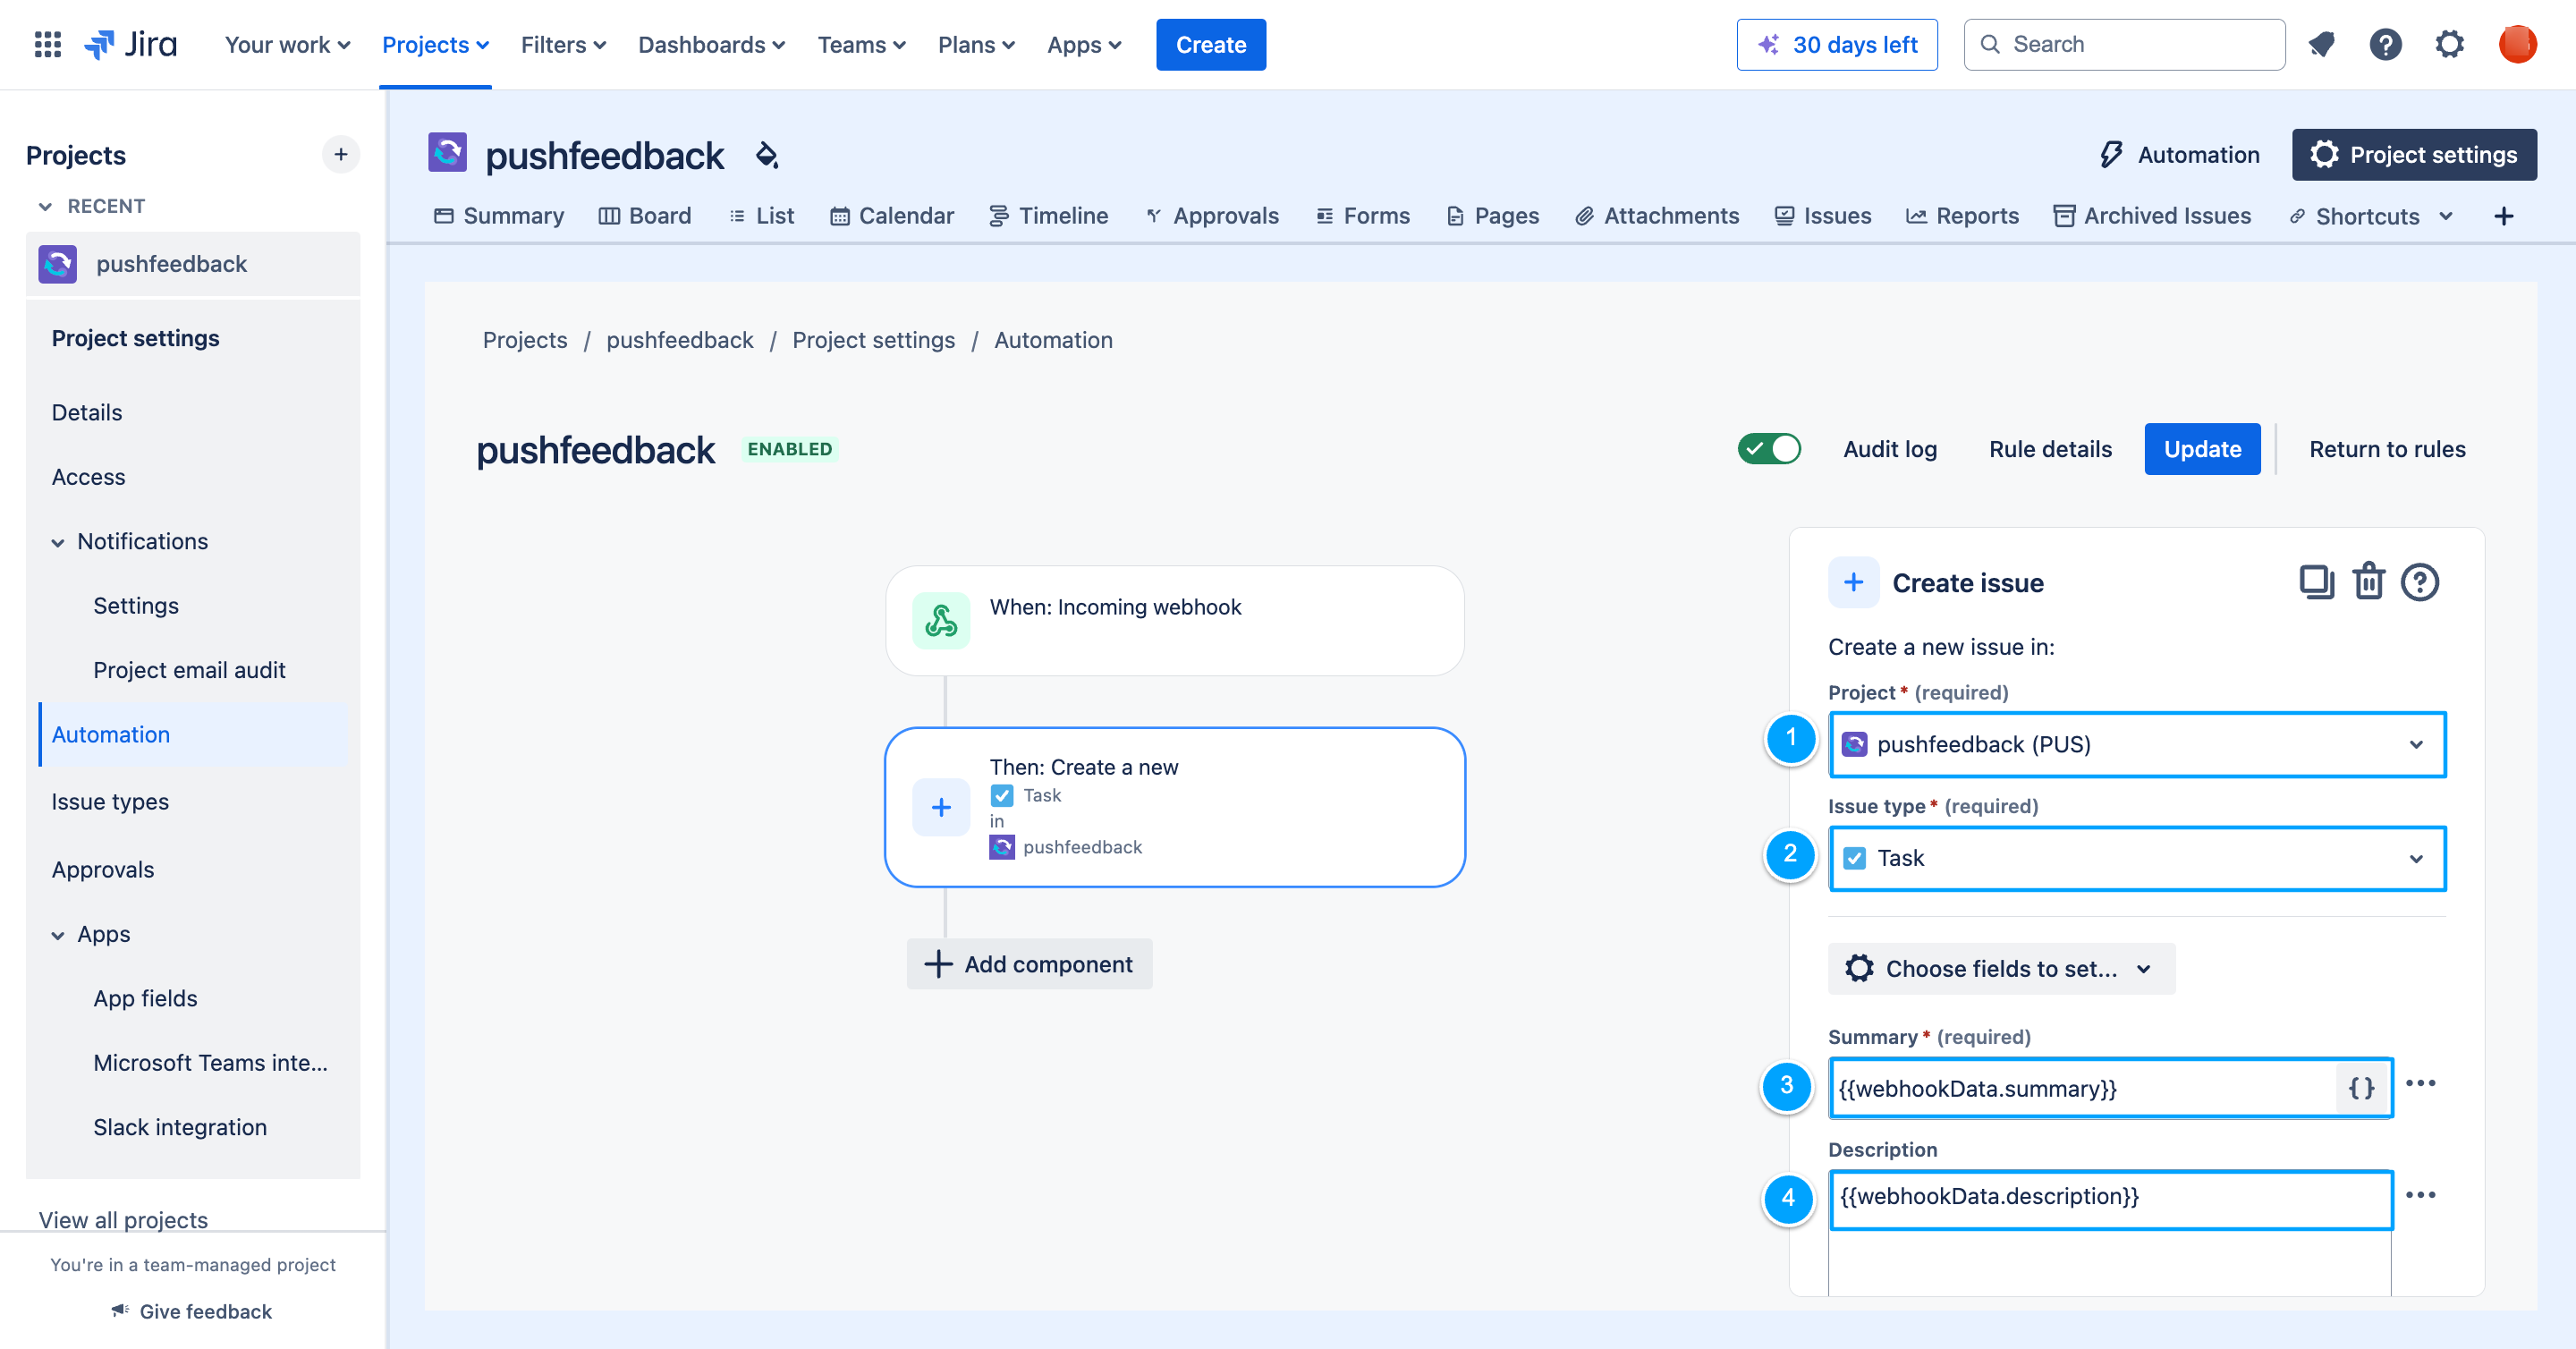
- Project: Set the Jira project where you want to create the issue.
- Issue type: Select the issue type you want to create.
- Summary: Set to
{{webhookData.summary}}. - Description: Set to
{{webhookData.description}}.
-
Click Next.
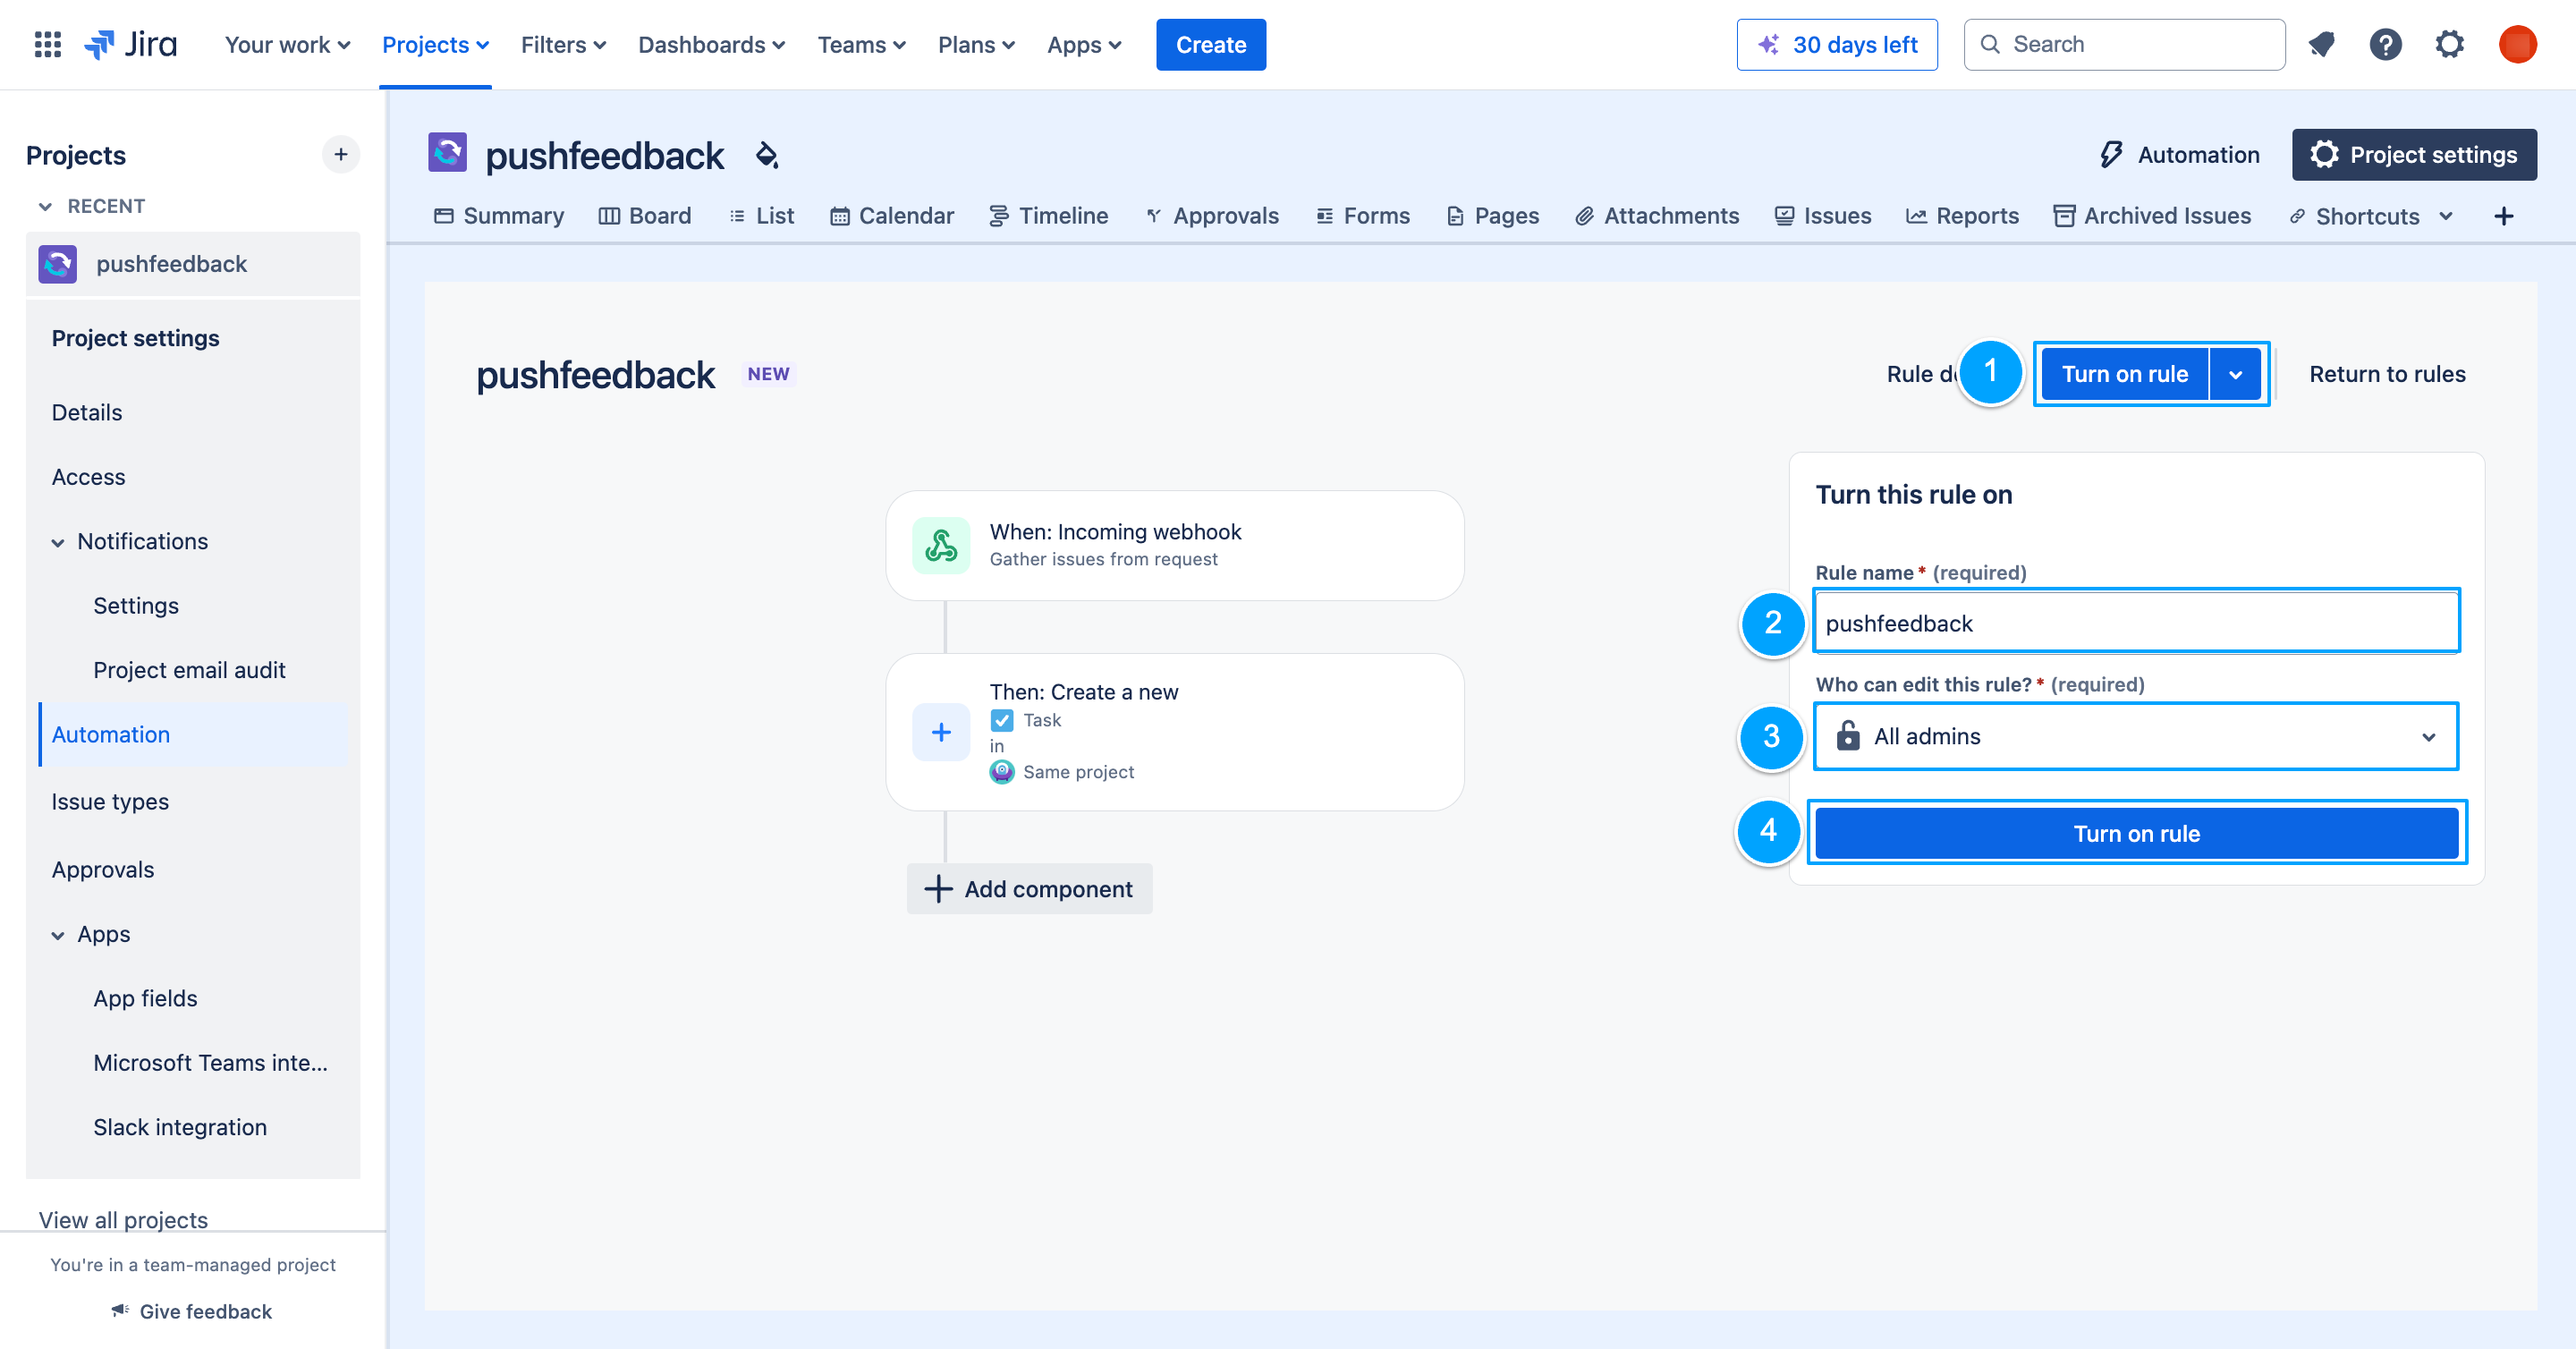
-
Click Turn on rule, set a name for your rule, and assign the necessary permissions:
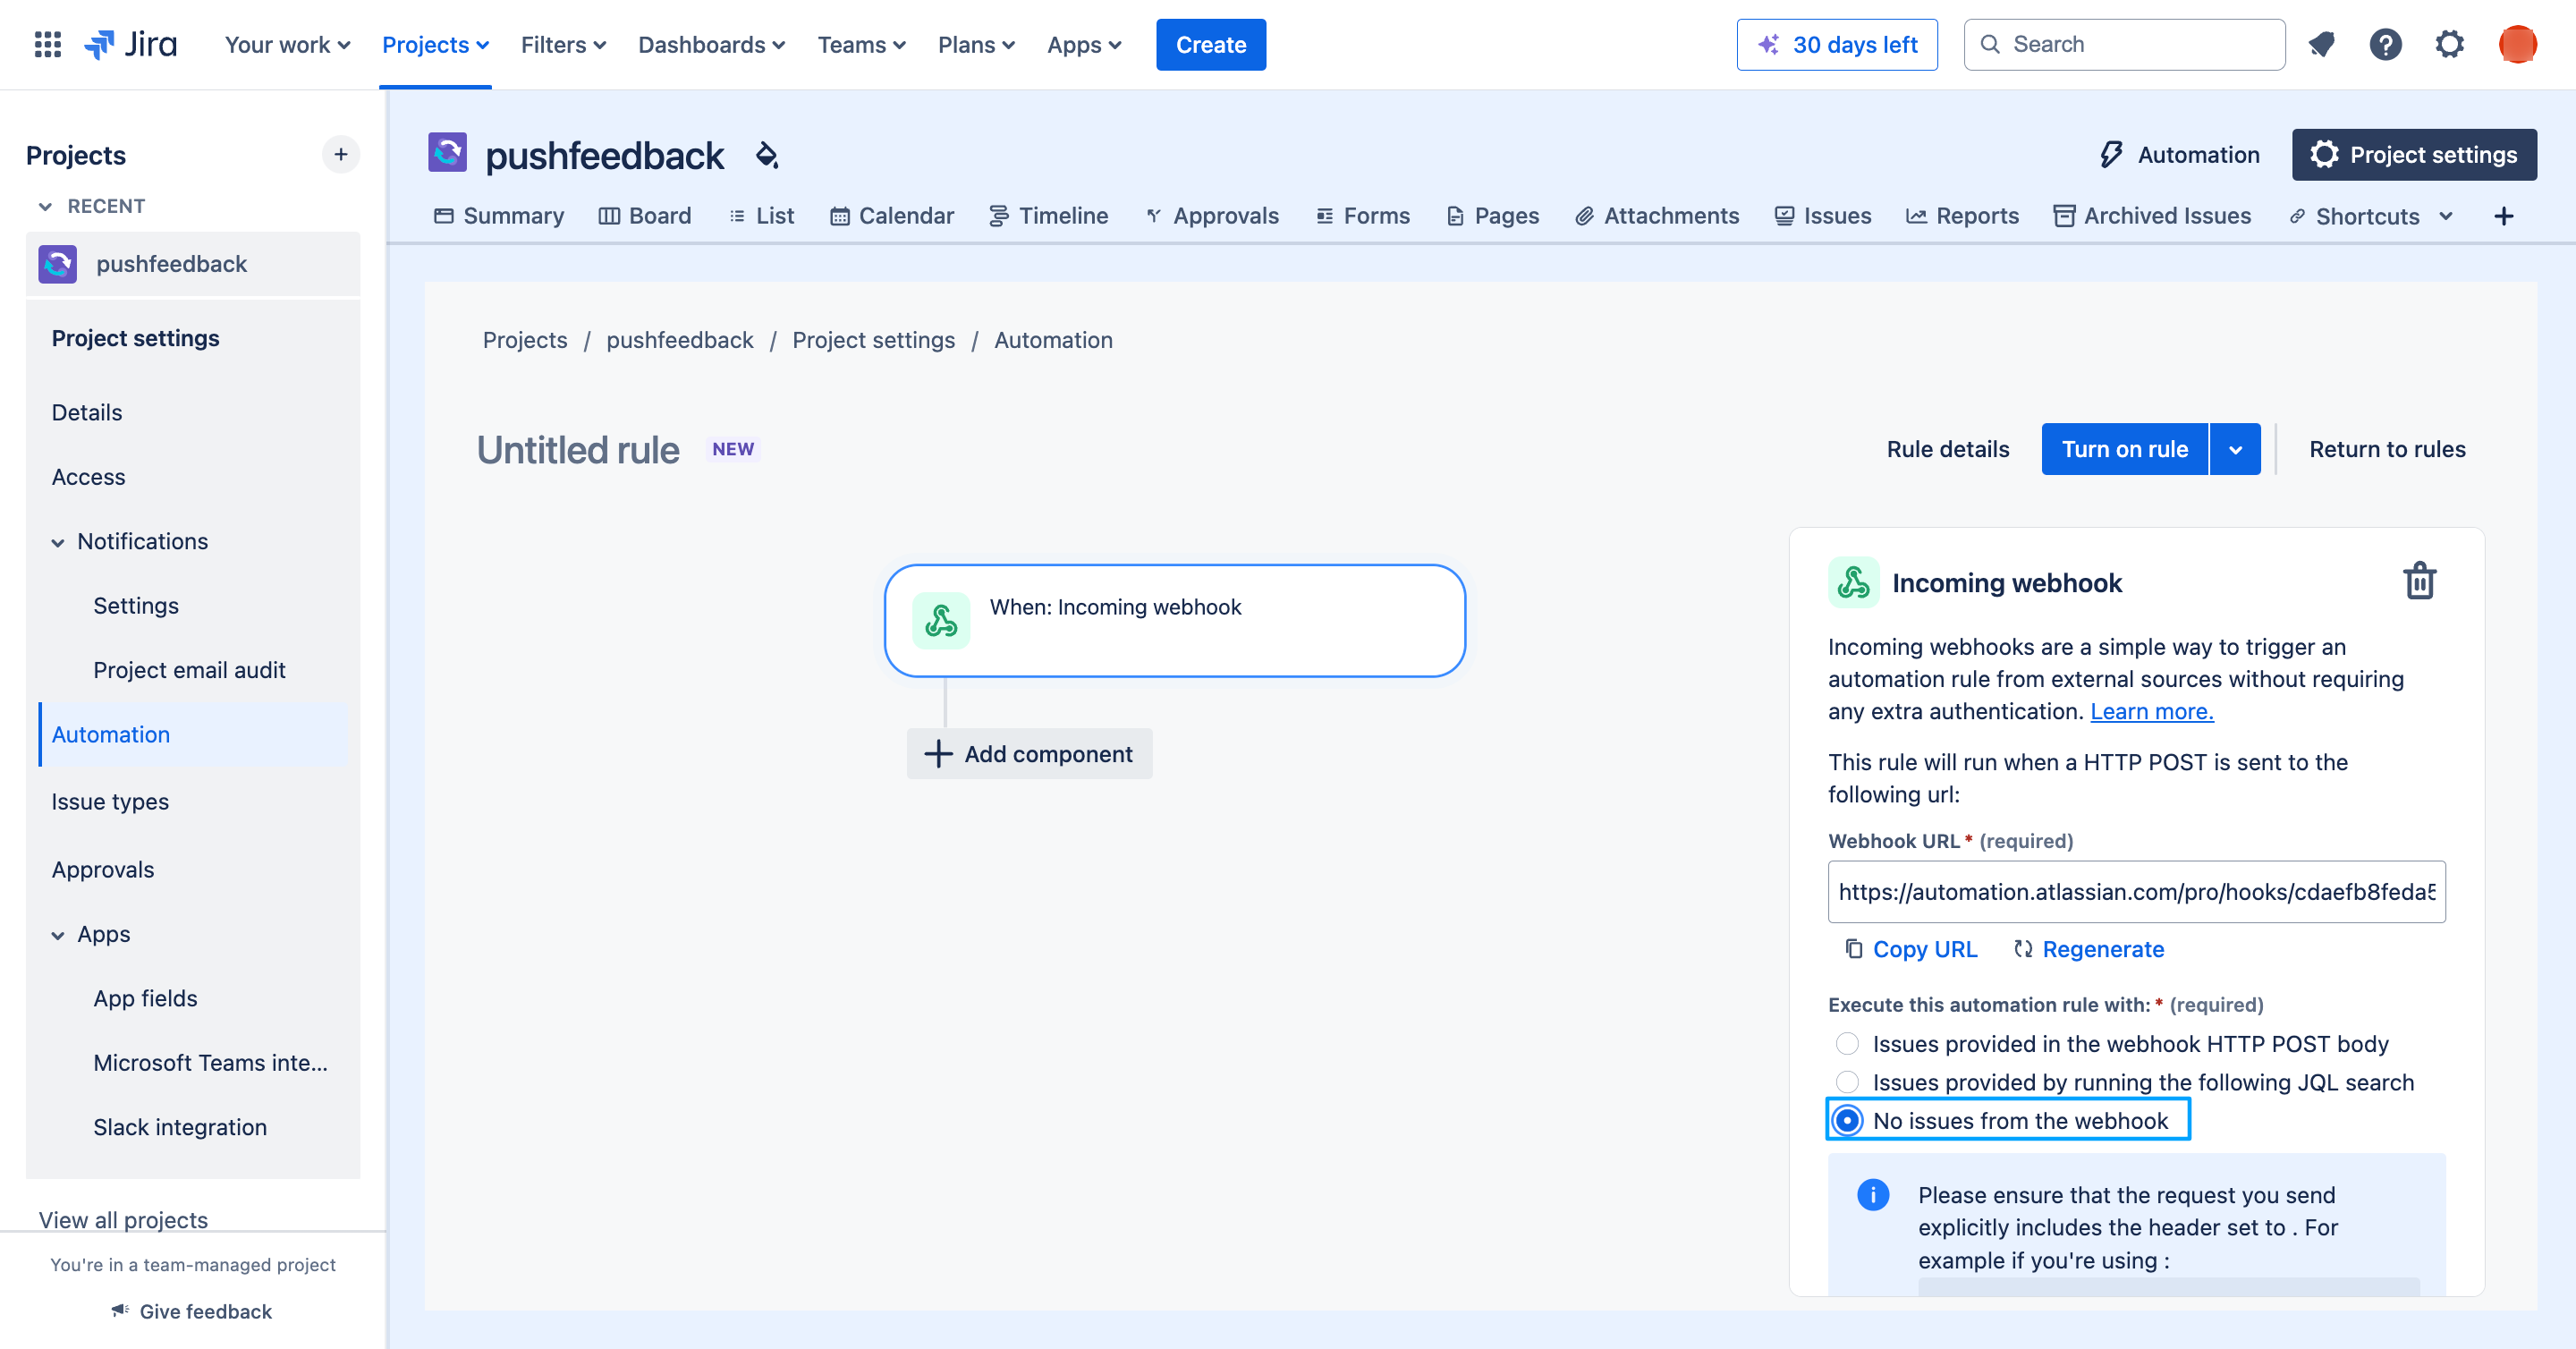
Get the incoming webhook details
-
Click the Incoming webhook.
-
On Work criteria, select No work items from the webhook:
-
Copy the webhook URL and secret - you'll need these in the following section.
importantSave both the webhook URL and secret in a secure location. You'll need them to configure PushFeedback.
-
Click Update.
2. Configure PushFeedback
-
Open app.pushfeedback.com and log in.
-
Go to Projects and select your project.
-
Click Settings, then under Integrations, select Jira.
-
Configure the webhook settings:
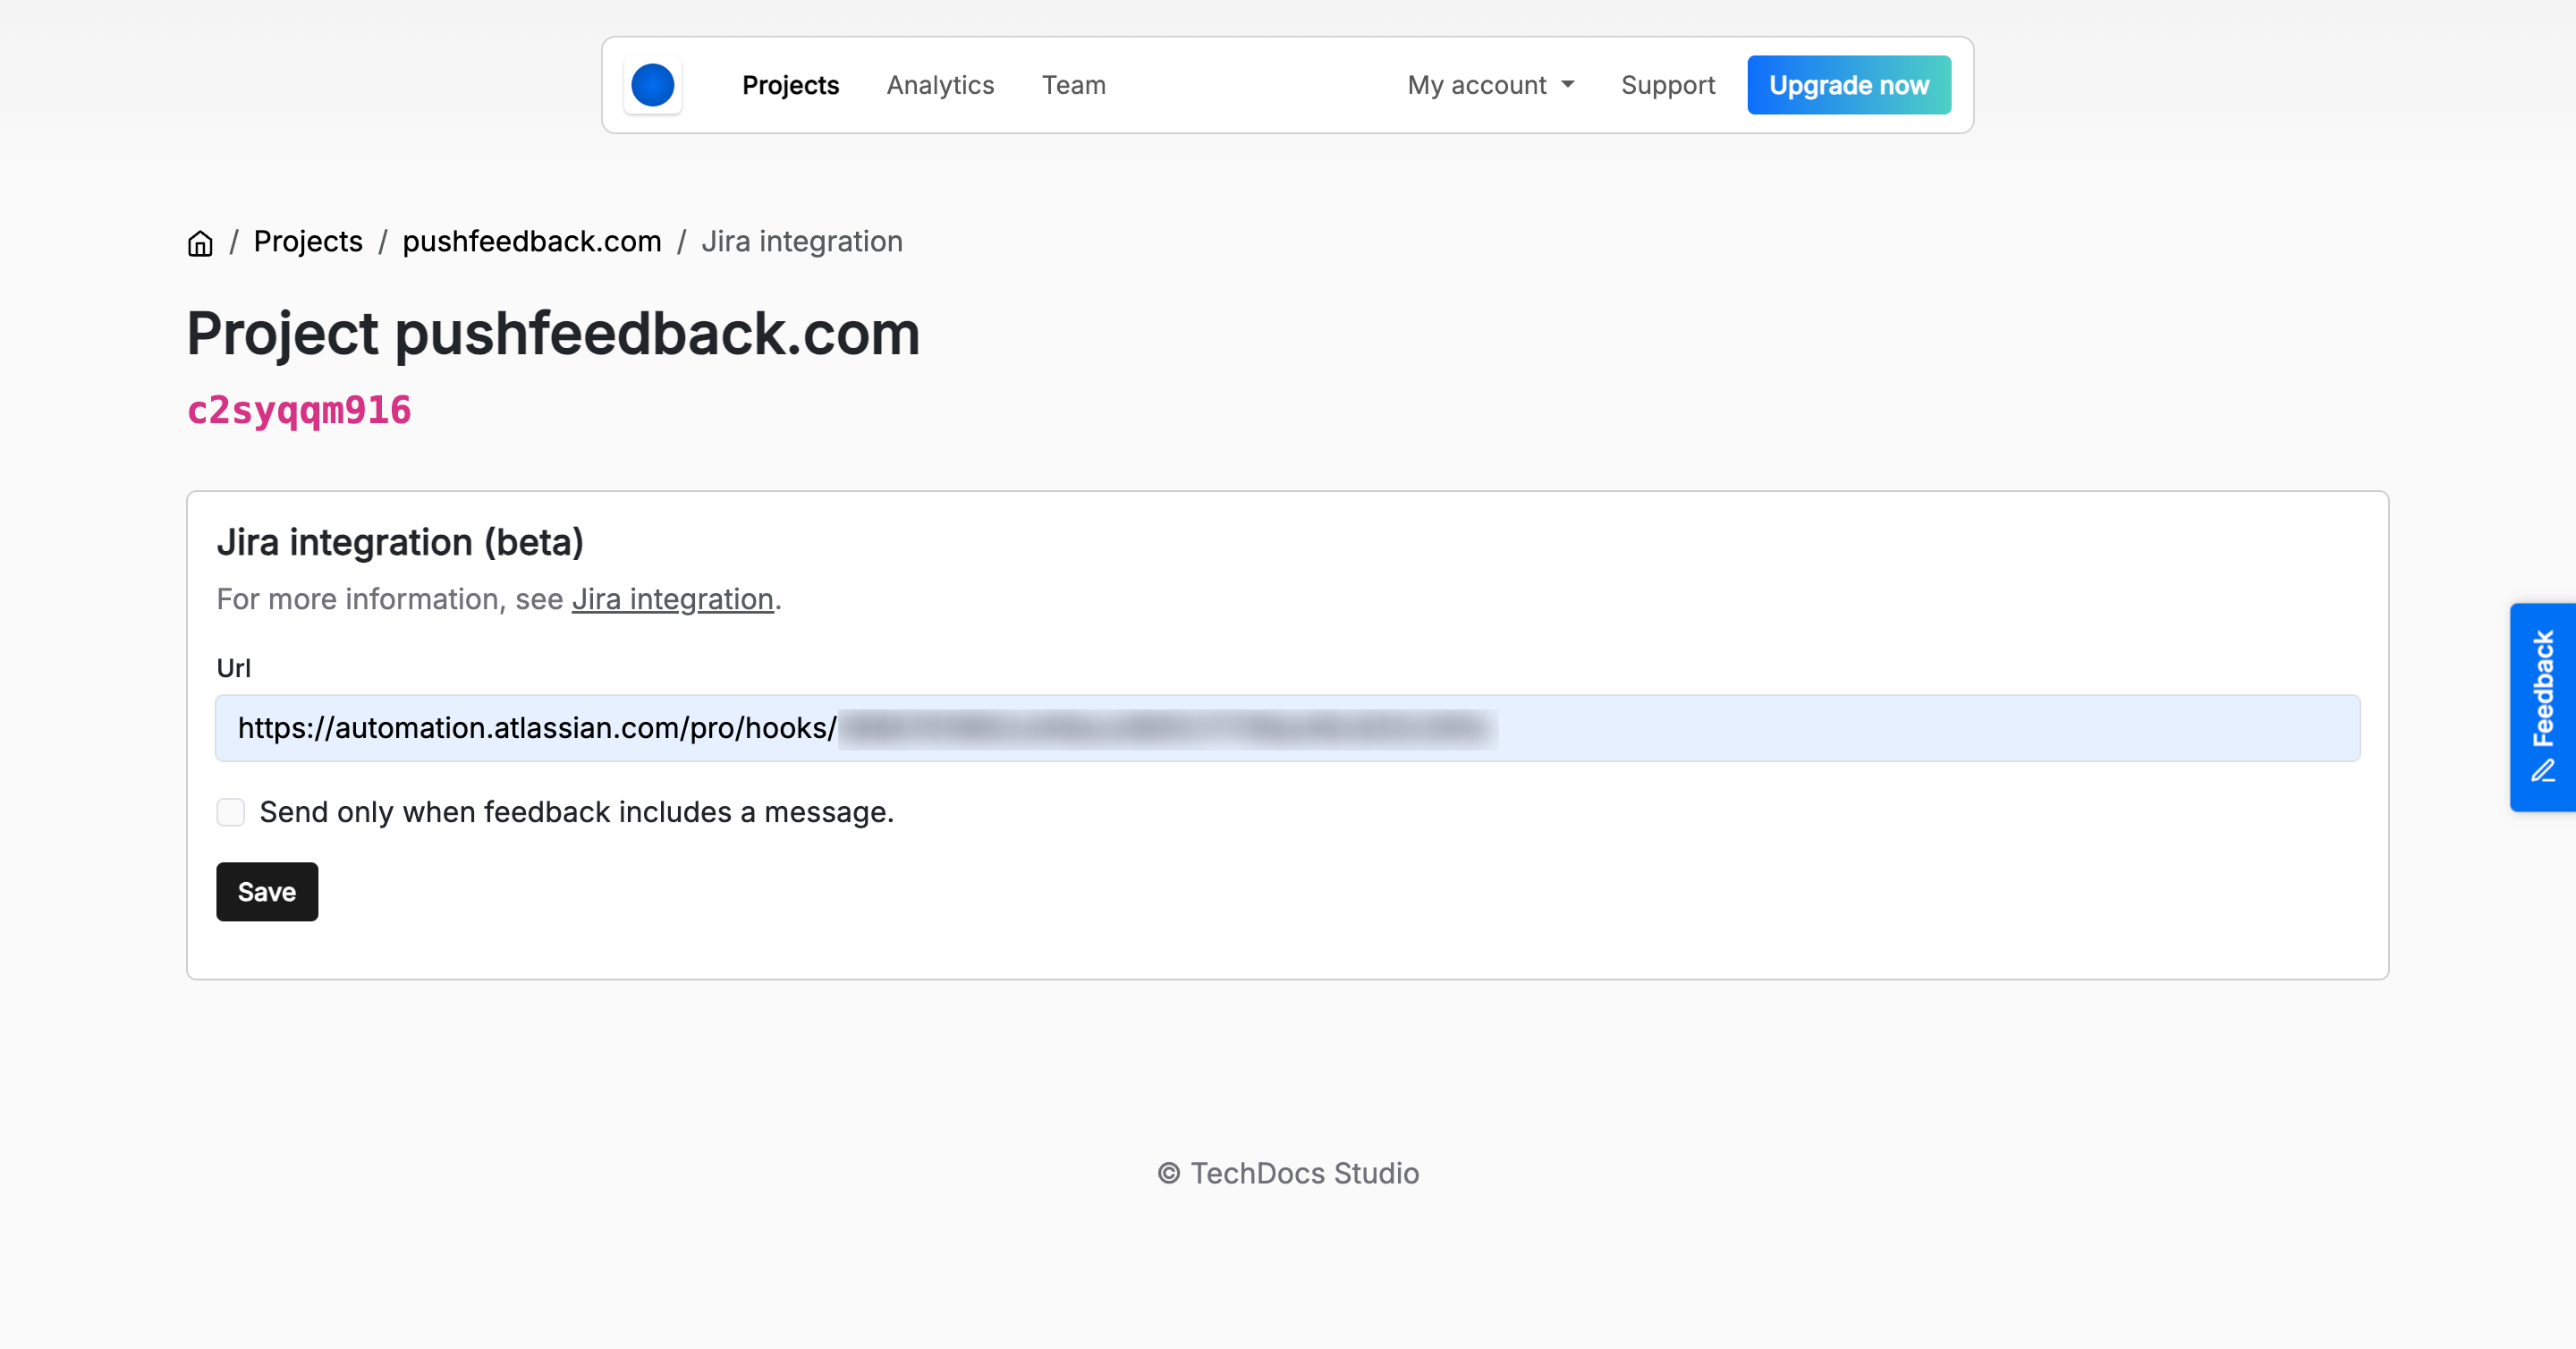
- Paste the webhook URL you copied from Jira
- If your Jira project requires authentication:
- Paste the webhook secret in the Secret field
- The secret will be sent as an
X-Automation-Webhook-Tokenheader with each request
-
Save your changes by clicking Save.
3. Test the integration
To ensure everything is working correctly:
-
Go to any webpage where you've implemented the feedback widget and submit a feedback entry.
-
Confirm the feedback appears on your specified Jira board as a new issue:
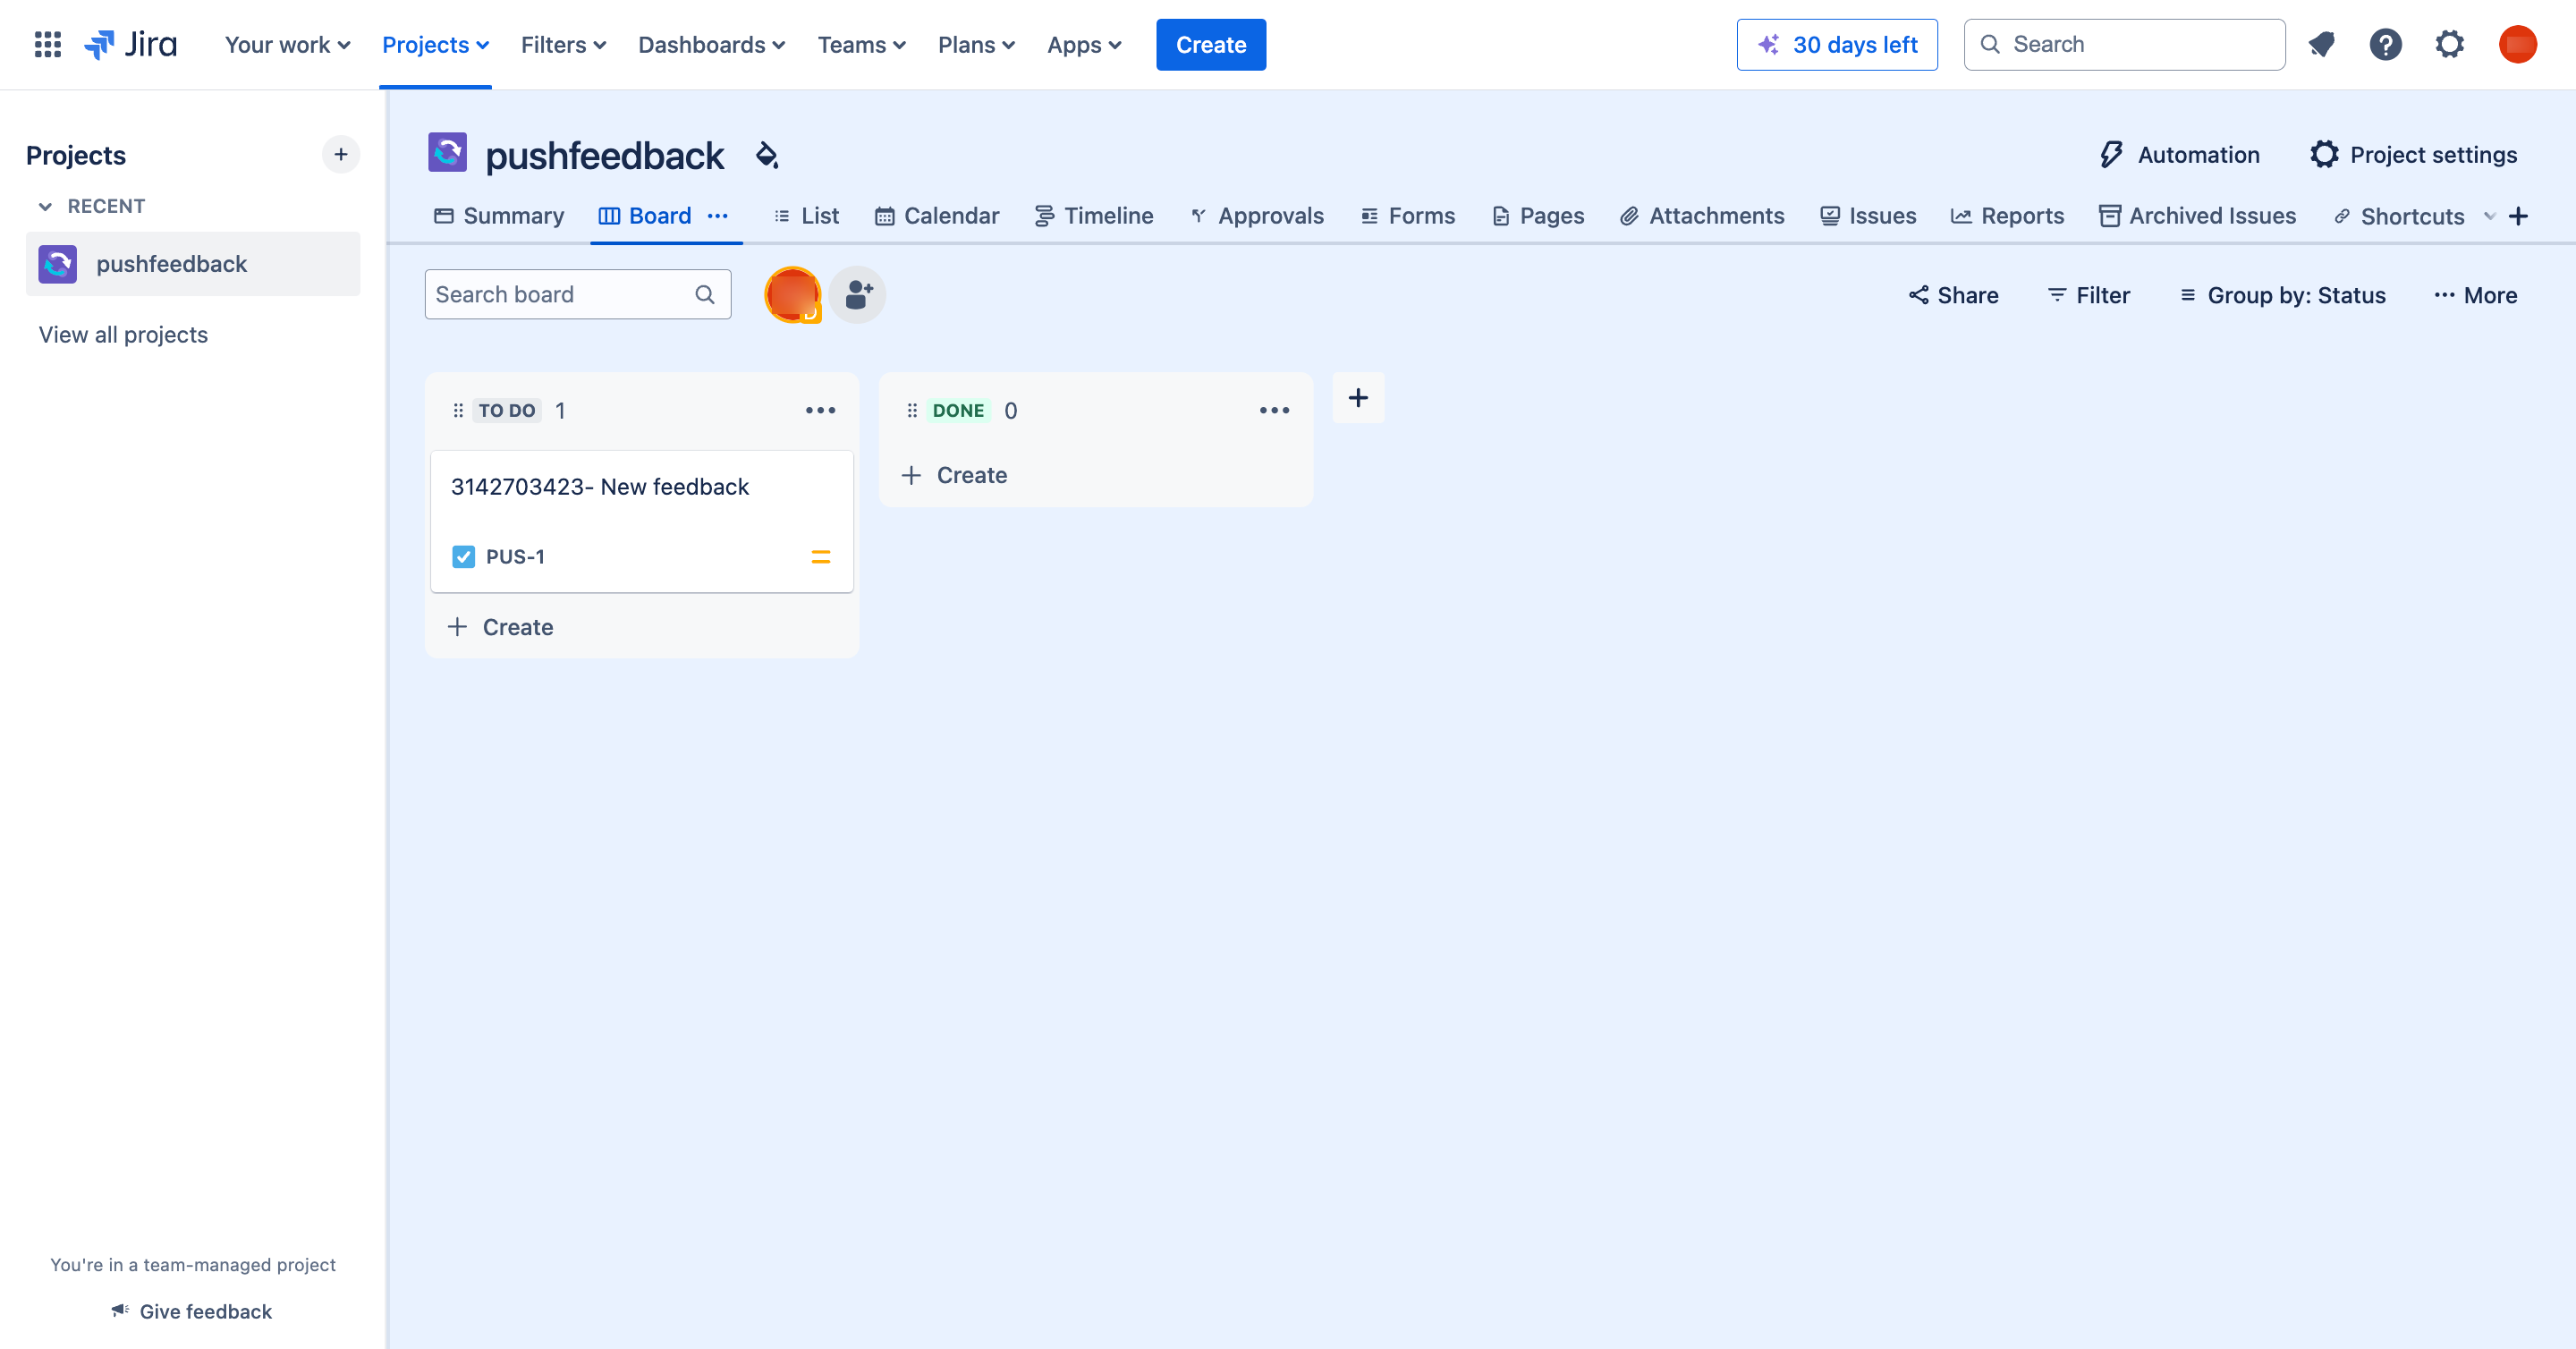
-
Verify that all relevant details are correctly mapped and visible on the Jira issue.
Troubleshooting
If the integration isn't working:
- Double-check the webhook URL and secret in PushFeedback.
- Verify the Jira automation rule is enabled.
- Check the Jira audit log for any error messages.