Connect Jira with Automation
PushFeedback can create Jira issues by sending feedback to a Jira Cloud Automation or Jira Data Center Automation incoming webhook. Jira Automation receives the webhook and creates the issue using a rule you control.
This is a webhook-based Jira Automation connection, not a direct Jira API integration. You configure the destination project, issue type, and field mapping inside the Jira automation rule.
Integrations are only available on the Professional and Unlimited plans. On the free plan, use email notifications instead.
Prerequisites
Before you begin, ensure you have:
- A PushFeedback account. If you don't have one, sign up for free.
- A project created in your PushFeedback dashboard. If you haven't created one yet, follow the steps in the Quickstart guide.
- A Jira workspace (Cloud or Data Center) with access to Automation options.
1. Create the Jira automation rule
Create the automation rule
-
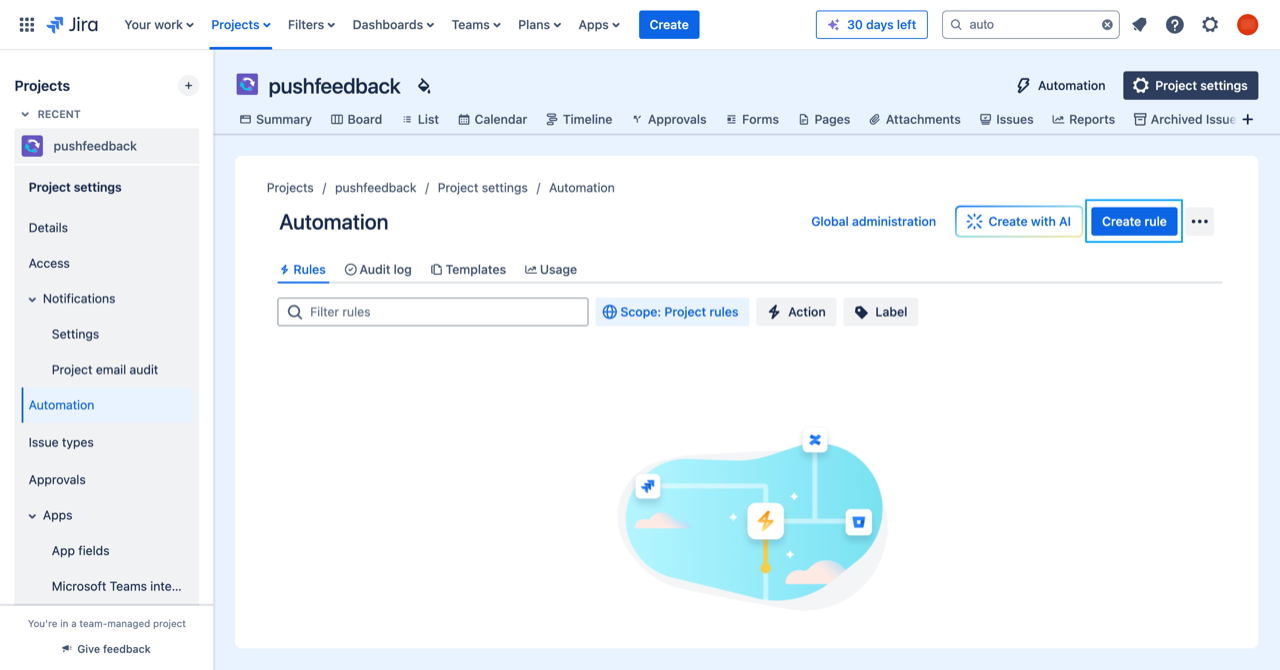
Go to Project settings in your Jira project.
-
Navigate to Automation under Project settings.
-
Click Create rule.
Configure the automation rule
-
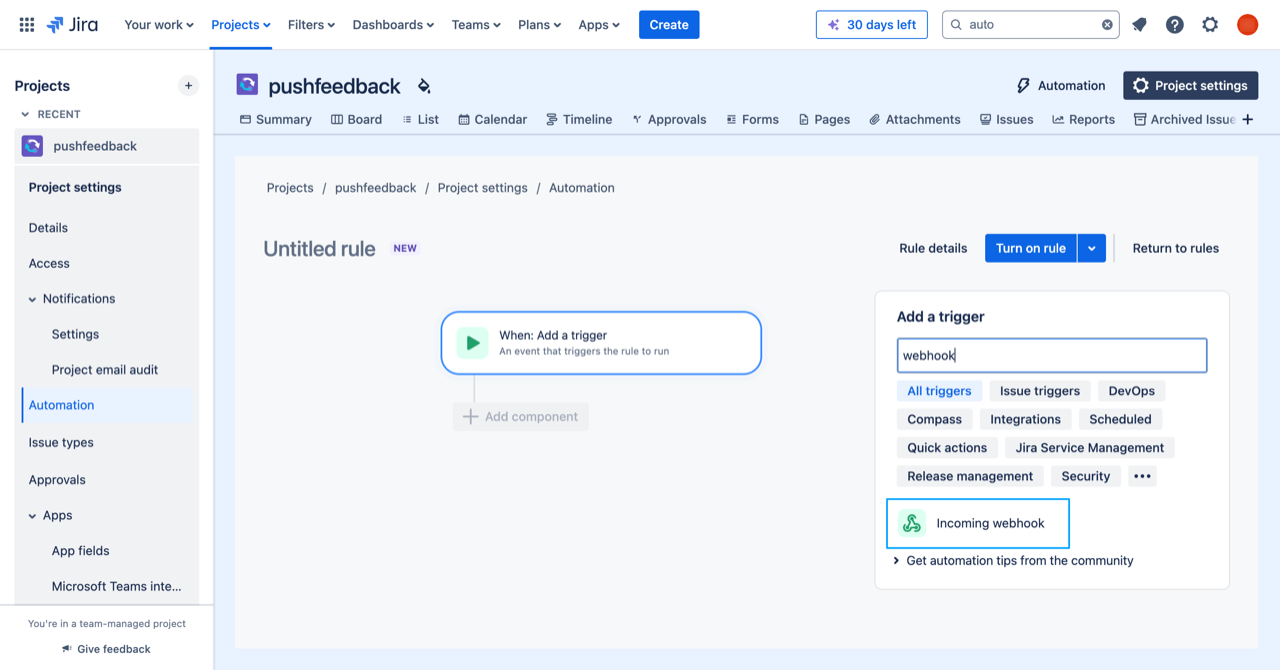
Choose the Incoming webhook trigger, then click Next.
-
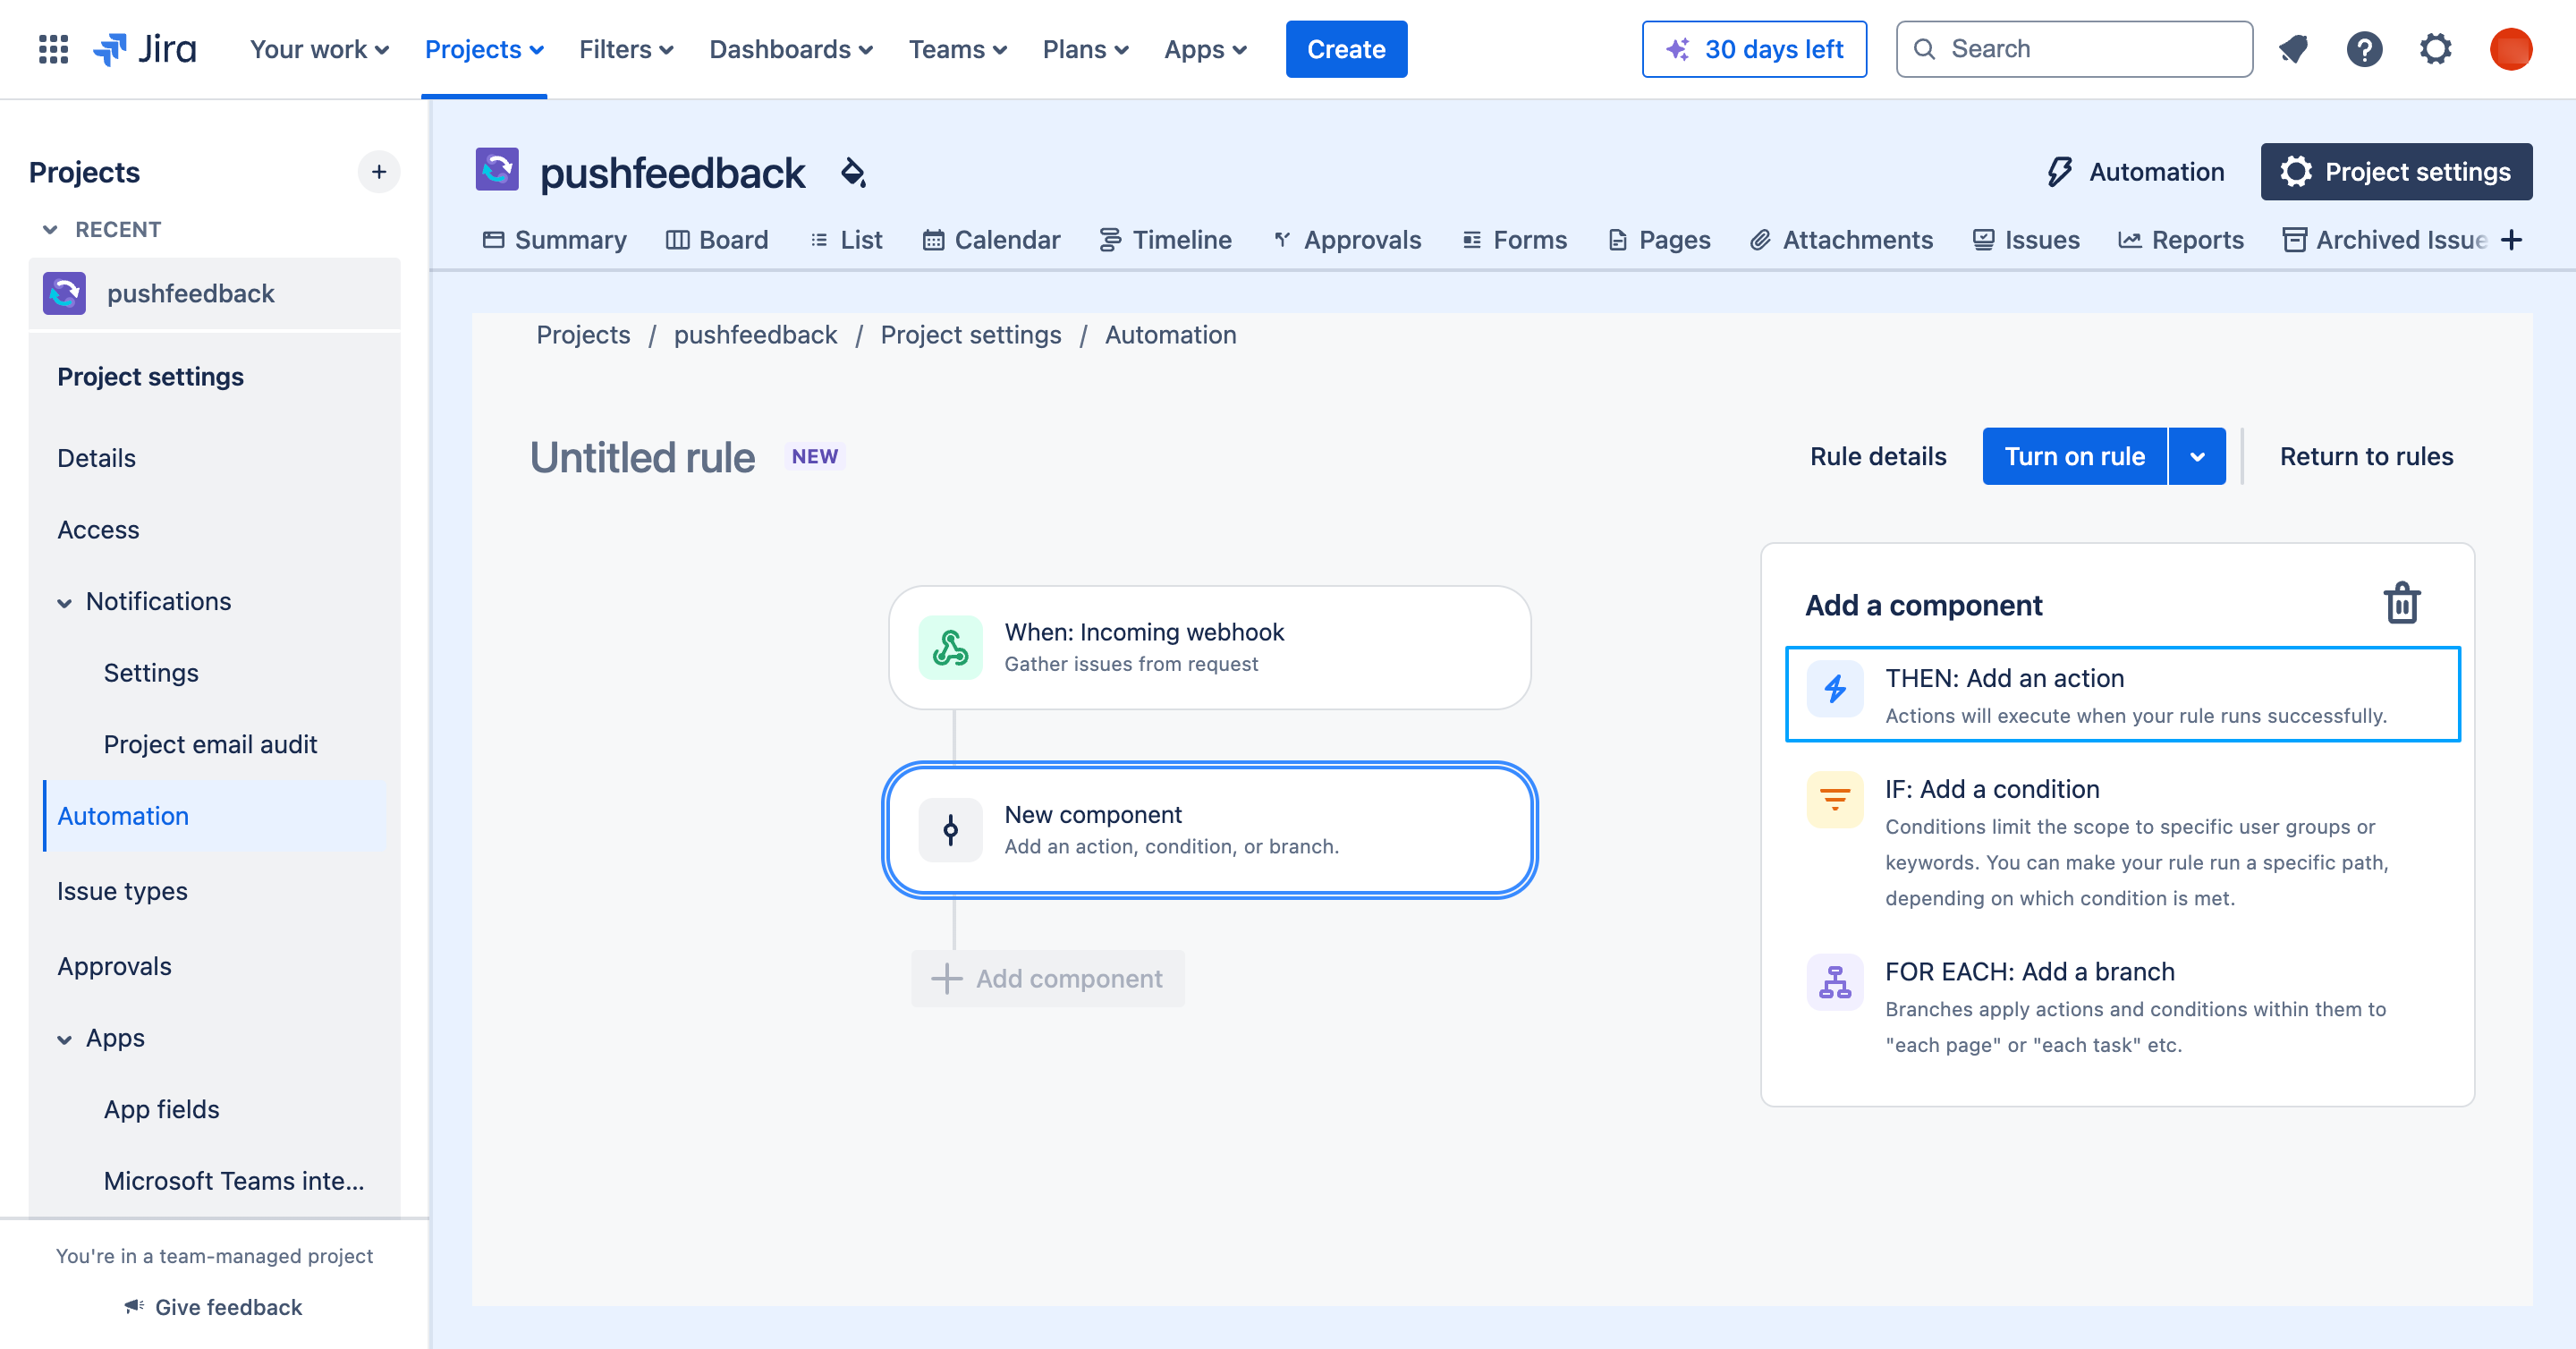
Create a Then component.
-
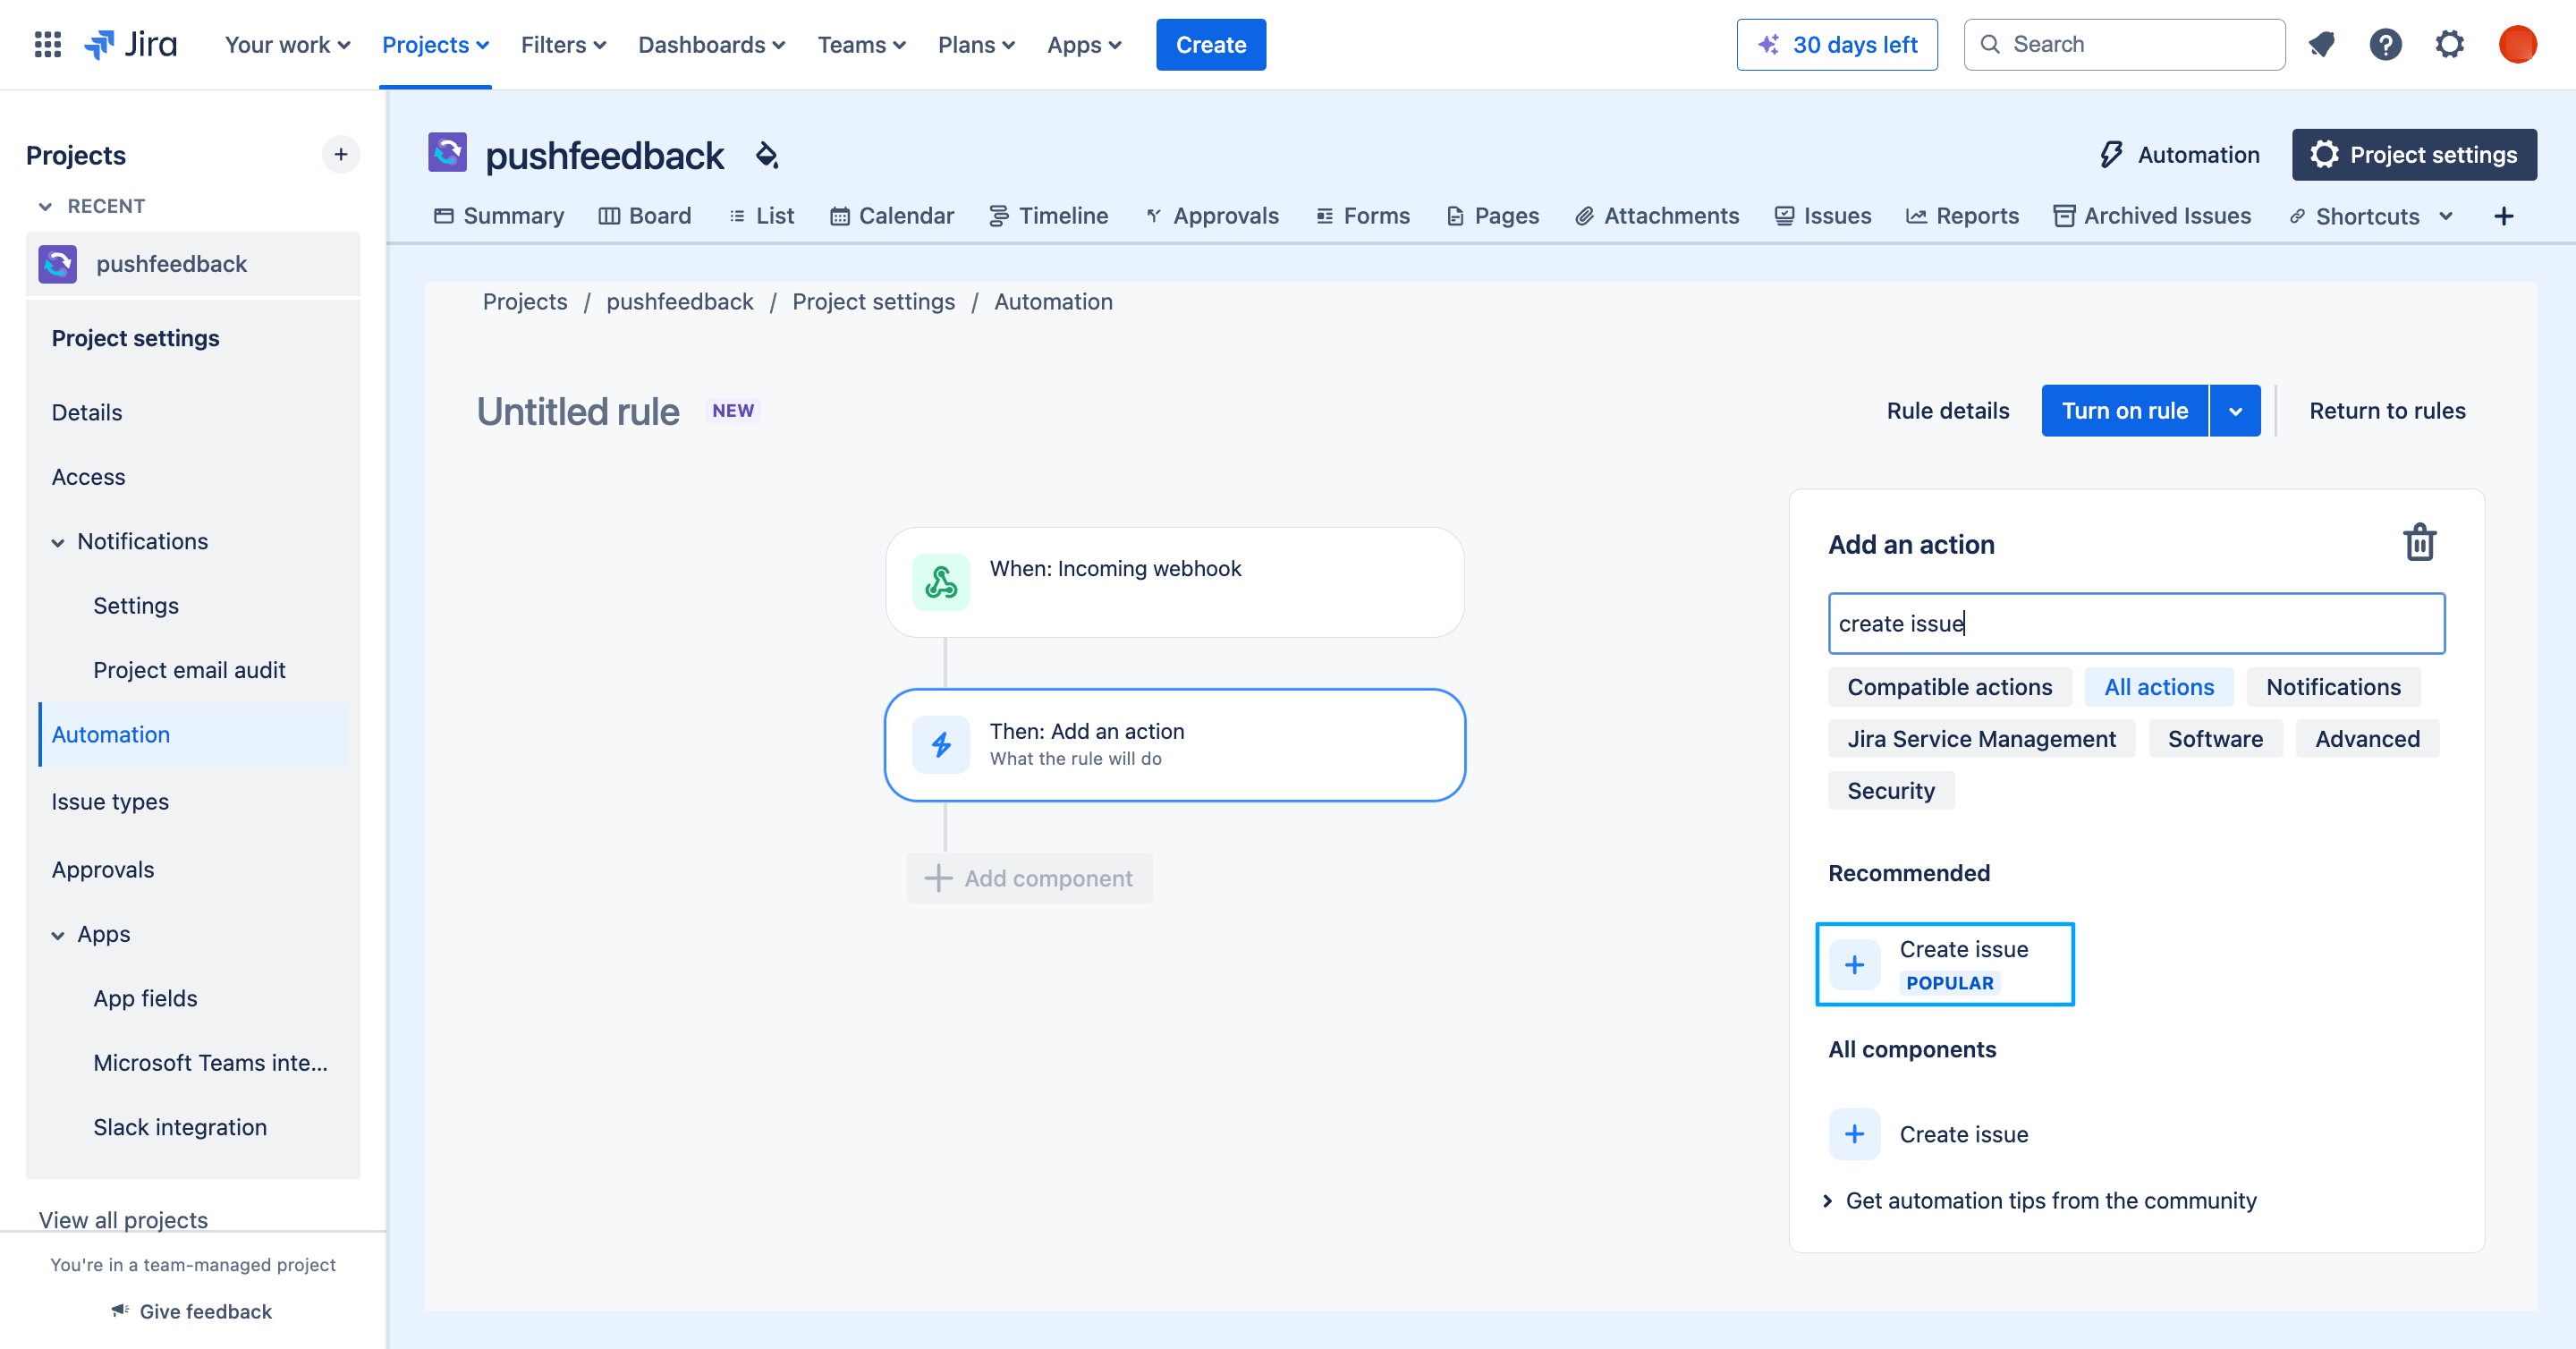
Configure the Then component to Create work item.
 tip
tipIf you don't see the Create work item component, ensure All actions is marked.
-
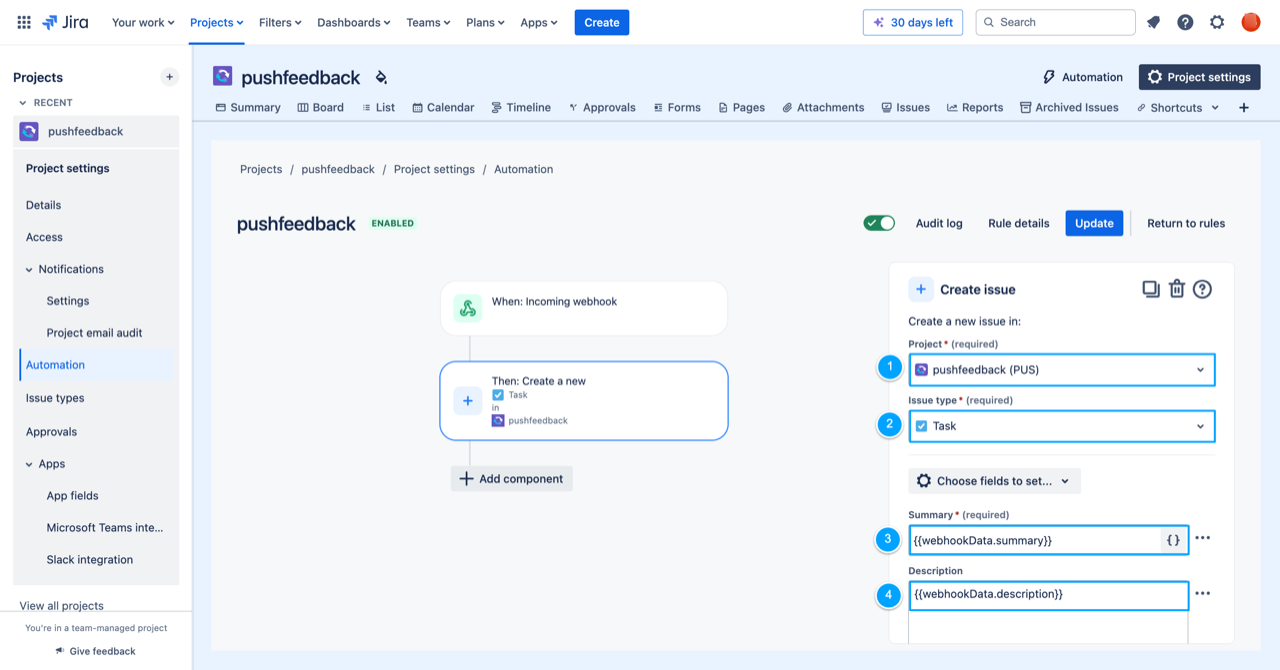
Configure the Create work item action:
- Project: Set the Jira project where you want to create the issue.
- Issue type: Select the issue type you want to create.
- Summary: Set to
{{webhookData.summary}}. - Description: Set to
{{webhookData.description}}.
-
Click Next.
-
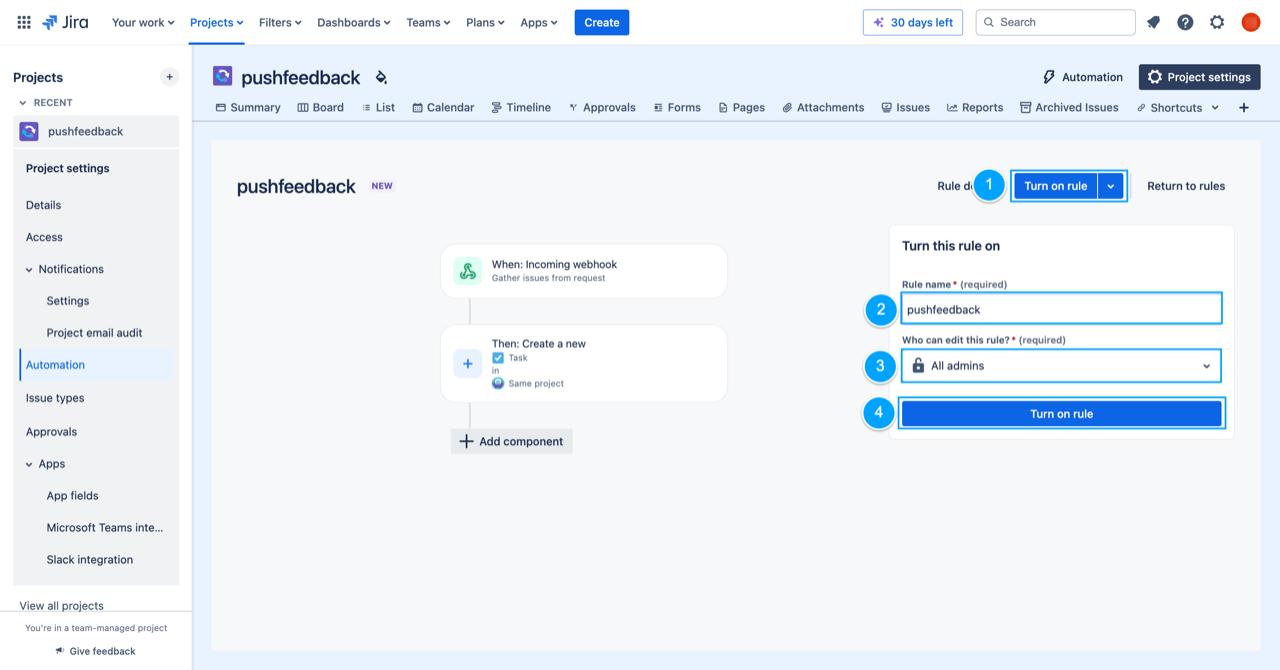
Click Turn on rule, set a name for your rule, and assign the necessary permissions.
Get the incoming webhook details
-
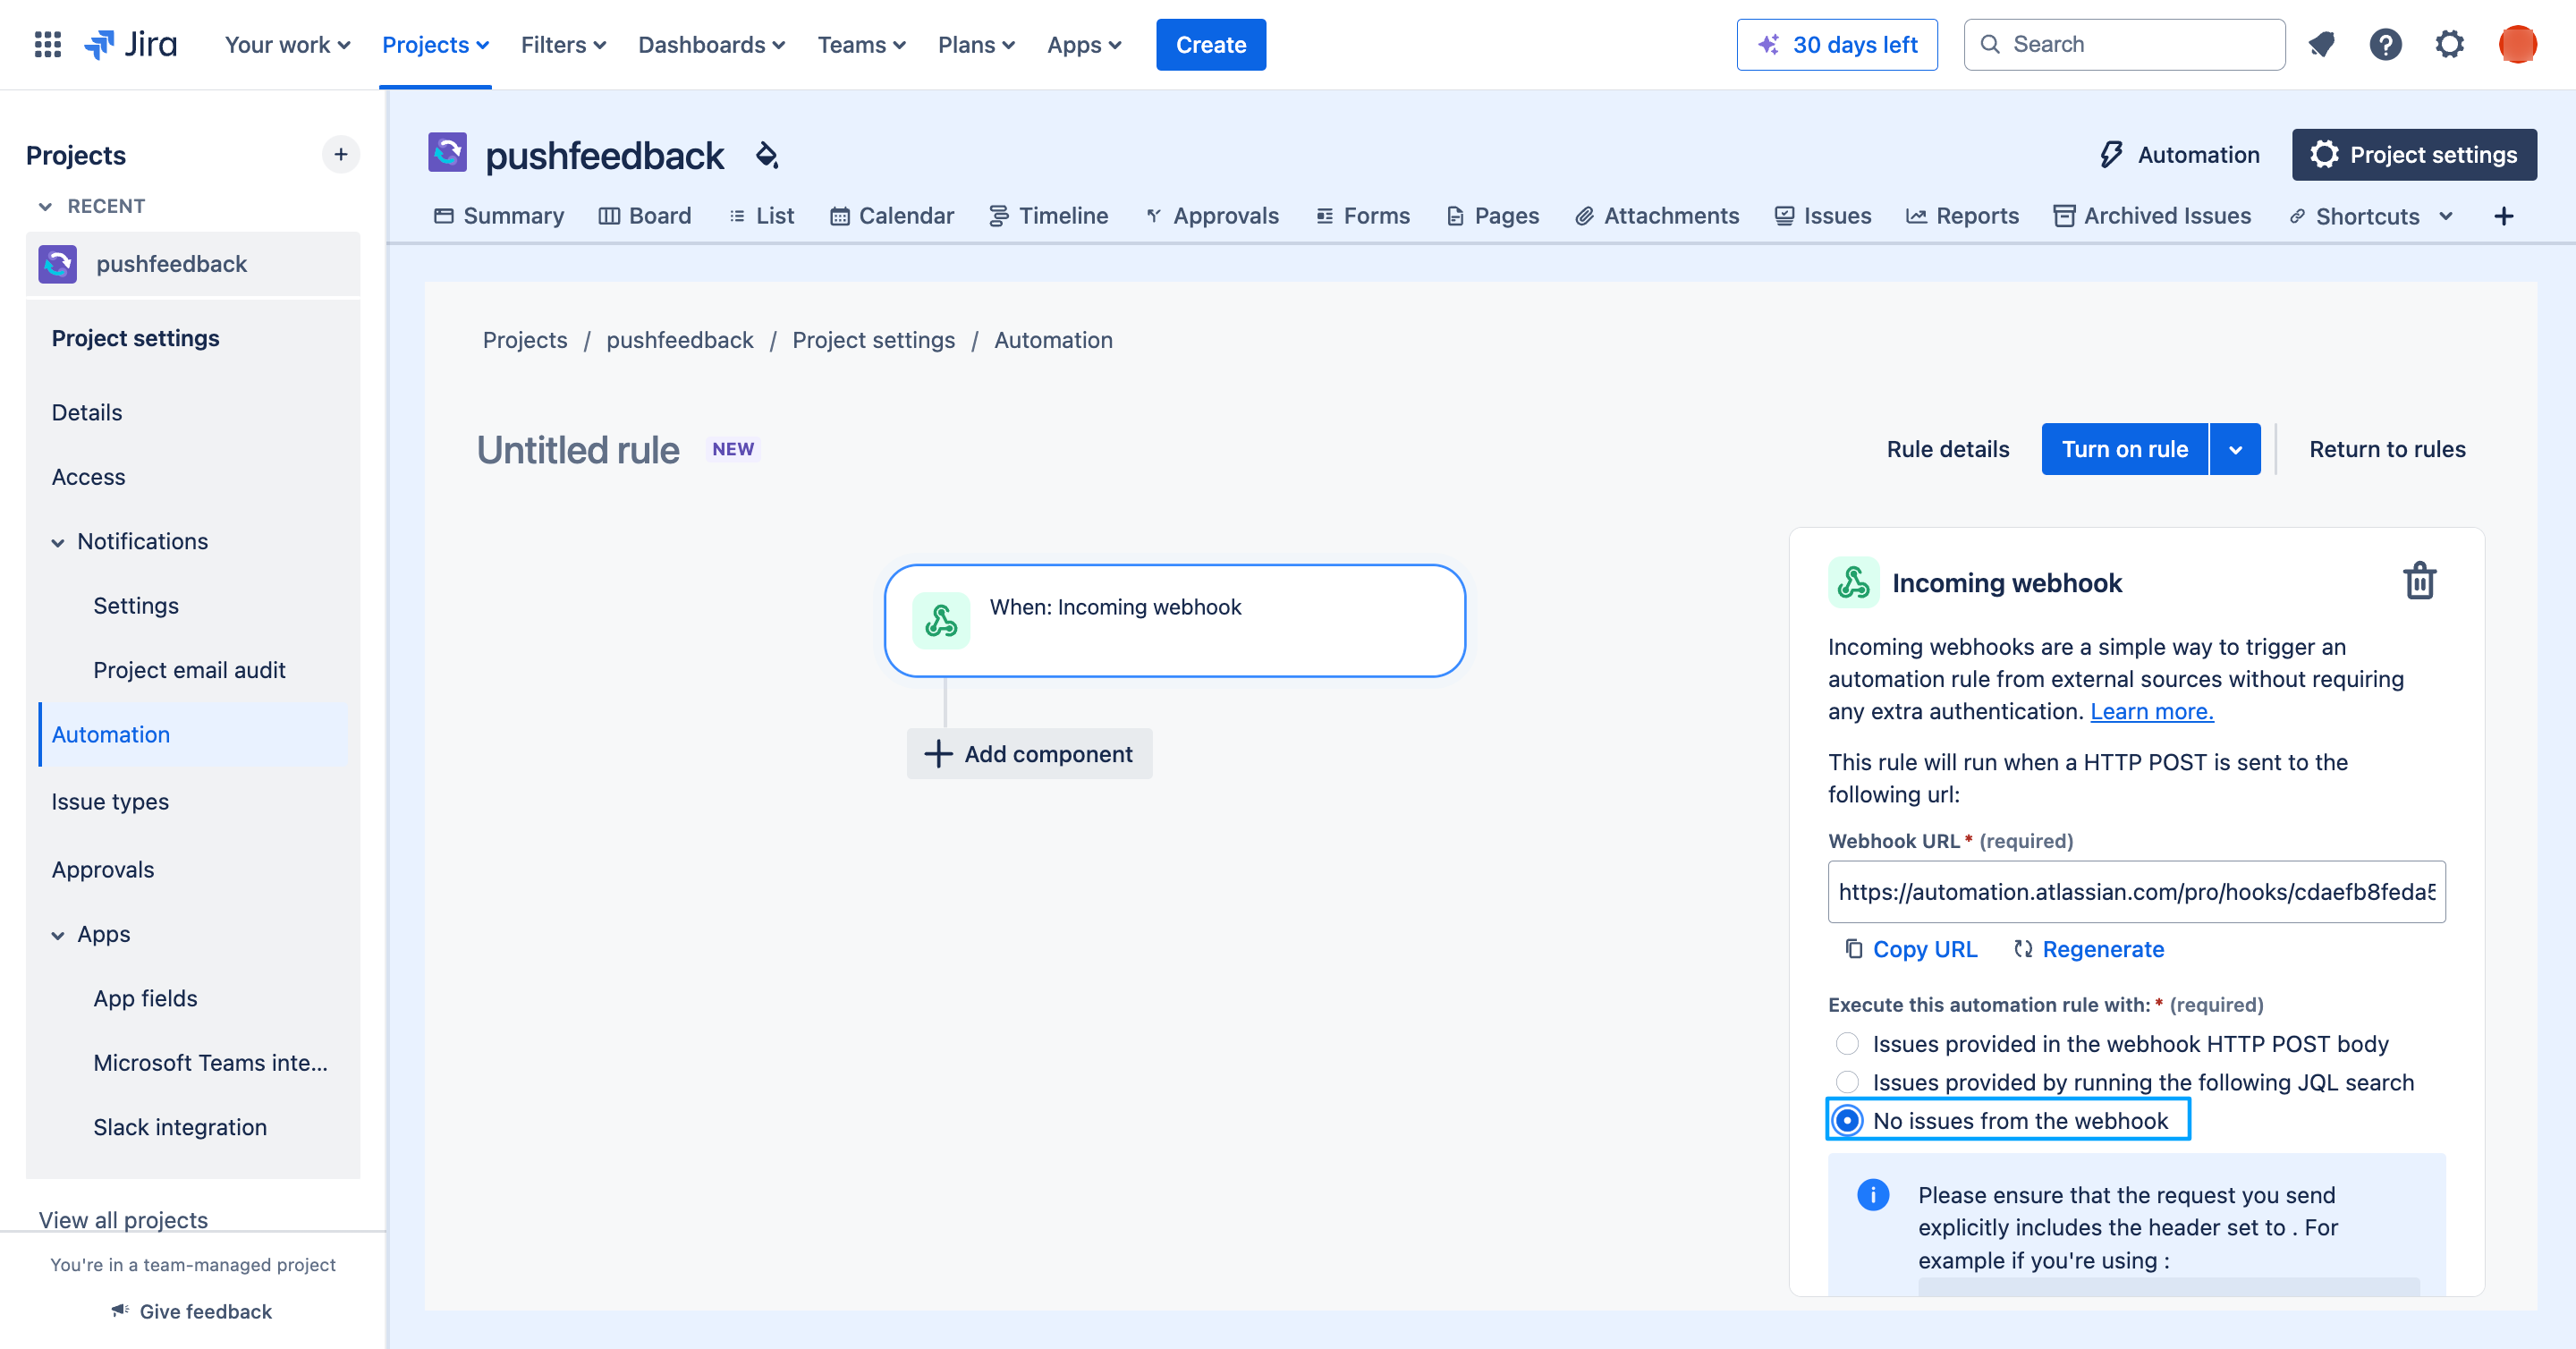
Click the Incoming webhook. For more context on the available options, see Atlassian's incoming webhook trigger guide.
-
On Work criteria, select No work items from the webhook.
-
Copy the webhook URL and token. You will need both when configuring PushFeedback.
importantSave both values in a secure location. You will need them to configure PushFeedback.
-
Click Update.
2. Connect PushFeedback
-
Open app.pushfeedback.com and log in.
-
Go to Projects and select your project.
-
Click Settings, then under Integrations, select Jira.
-
Configure the Jira Automation connection:
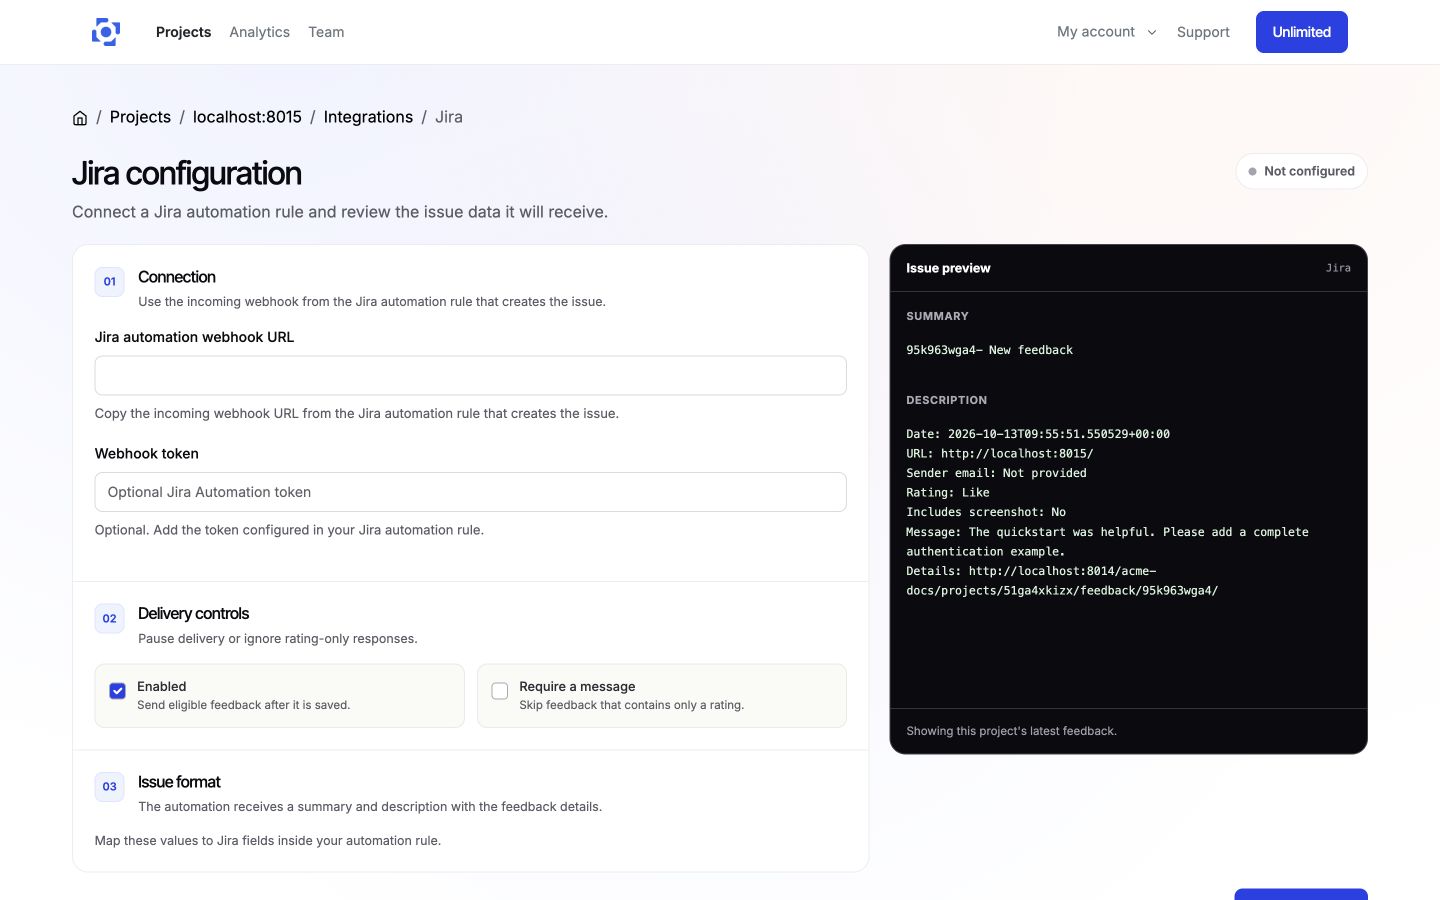
- Paste the Jira incoming webhook URL into Jira automation webhook URL.
- Paste the Jira token into Webhook token when the rule requires it. PushFeedback sends it in the
X-Automation-Webhook-Tokenheader. The saved token is never displayed again. - Keep Enabled selected or pause delivery without removing the connection.
- Select Require a message if rating-only feedback should not create Jira issues.
- On wider screens, review the summary and description in 03 Issue format. The preview uses the project's latest feedback, or sample data when the project is empty.
-
Save your changes by clicking Save integration.
3. Verify the connection
To ensure everything is working correctly:
-
Go to a page where you installed the feedback widget and submit a feedback entry with a message.
-
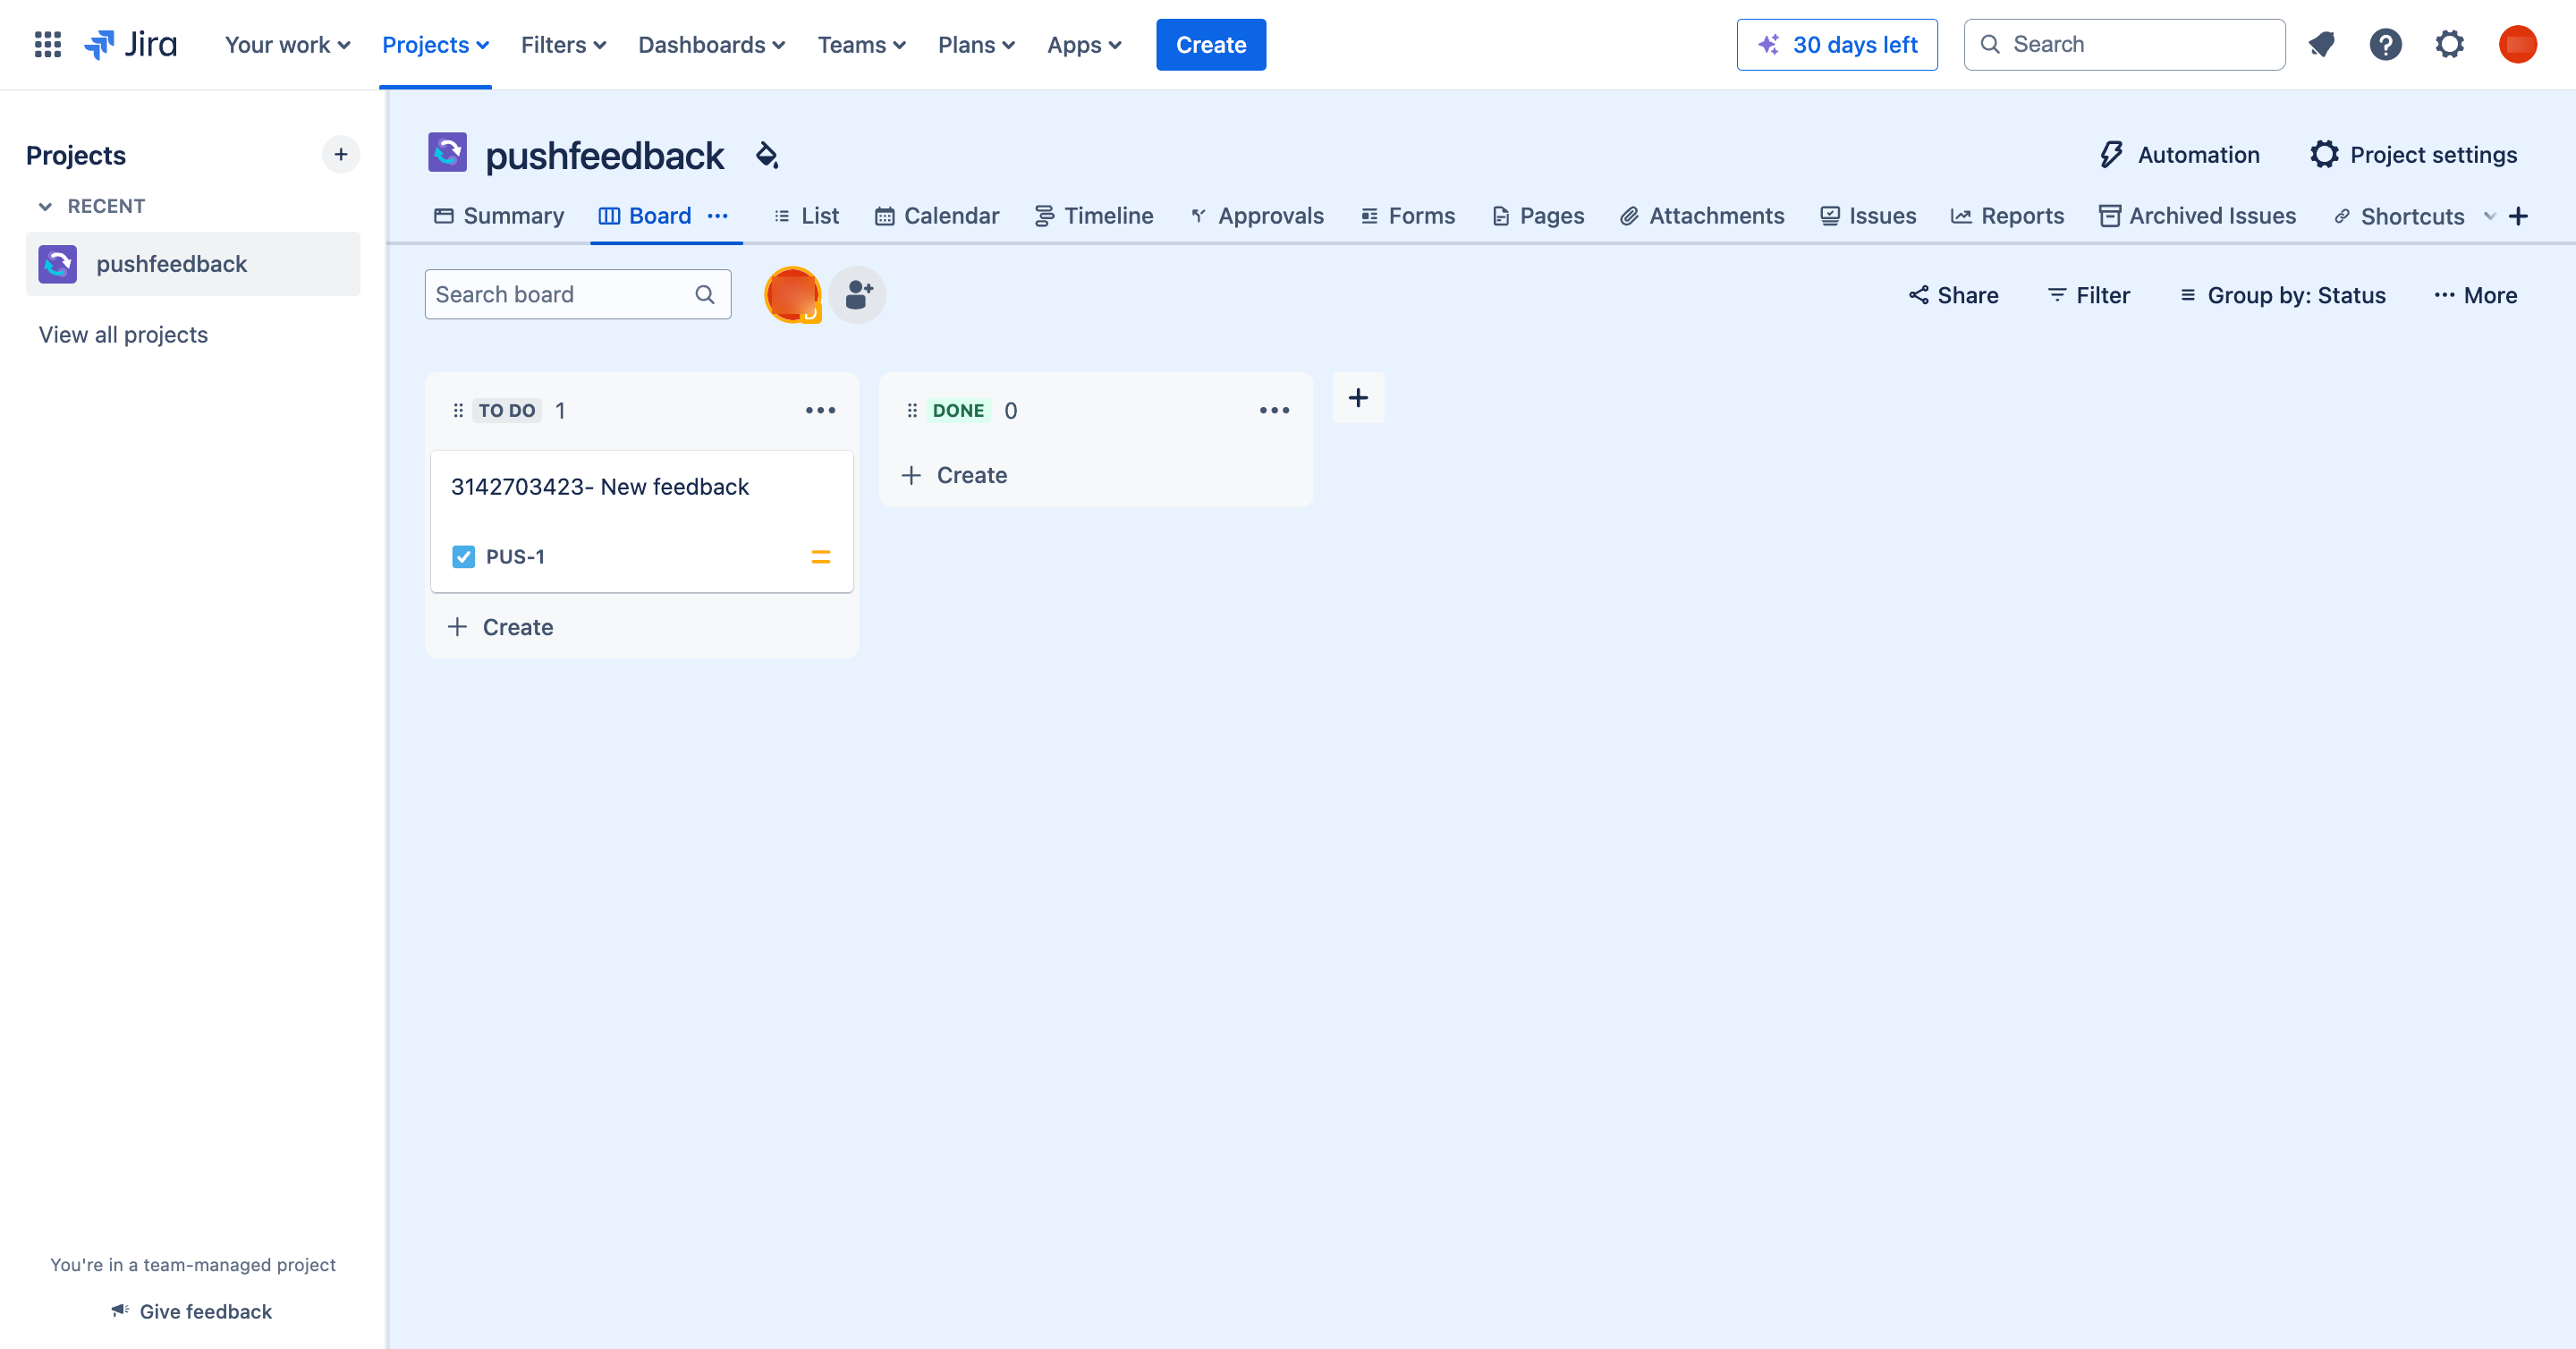
Confirm the feedback appears on your specified Jira board as a new issue.
-
Verify that all relevant details are correctly mapped and visible on the Jira issue.
Troubleshooting
If the integration isn't working:
- Double-check the webhook URL and token in PushFeedback.
- Verify the Jira automation rule is enabled.
- Check the Jira audit log for any error messages.
Remove the integration
To disconnect Jira Automation, open its settings in your PushFeedback dashboard and select Remove, then confirm Remove integration.