Feedback widget for LearnDash
PushFeedback collects user feedback directly from your website. This guide covers installation in LearnDash, with options for automatic and custom widget placement.
Prerequisites
Before you begin, you need:
- A PushFeedback account. If you don't have one, sign up for free.
- A project created in your PushFeedback dashboard. If you haven't created one yet, follow the steps in the Quickstart guide.
- Access to your LearnDash website in WordPress.
Basic installation
-
Access the admin dashboard of your LearnDash website by navigating to
http://yourwebsite.com/wp-admin/. -
Go to Appearance > Theme Editor.
-
Add the following code at the end of your theme's
functions.phpfile:function is_learn_dash_fullscreen() {return is_singular(array('sfwd-lessons', 'sfwd-quiz', 'sfwd-topic'));}function enqueue_pushfeedback_scripts_conditionally() {if (is_learn_dash_fullscreen()) {echo '<link rel="stylesheet" href="https://cdn.jsdelivr.net/npm/pushfeedback/dist/pushfeedback/pushfeedback.css">';echo '<script type="module" src="https://cdn.jsdelivr.net/npm/pushfeedback/dist/pushfeedback/pushfeedback.esm.js"></script>';}}add_action('wp_head', 'enqueue_pushfeedback_scripts_conditionally');function inject_custom_feedback_widget($content) {static $widget_injected = false;if (is_learn_dash_fullscreen() && !$widget_injected) {$project_id = '<YOUR_PROJECT_ID>'; // Replace with your actual project ID$widget_html = '<feedback-buttonproject="' . $project_id . '"button-style="dark"modal-position="bottom-right"button-position="bottom-right">Share feedback</feedback-button>';$widget_injected = true;return $content . $widget_html;}return $content;}add_filter('the_content', 'inject_custom_feedback_widget');Replace
<YOUR_PROJECT_ID>with your project's ID from the PushFeedback dashboard. -
Save your changes.
-
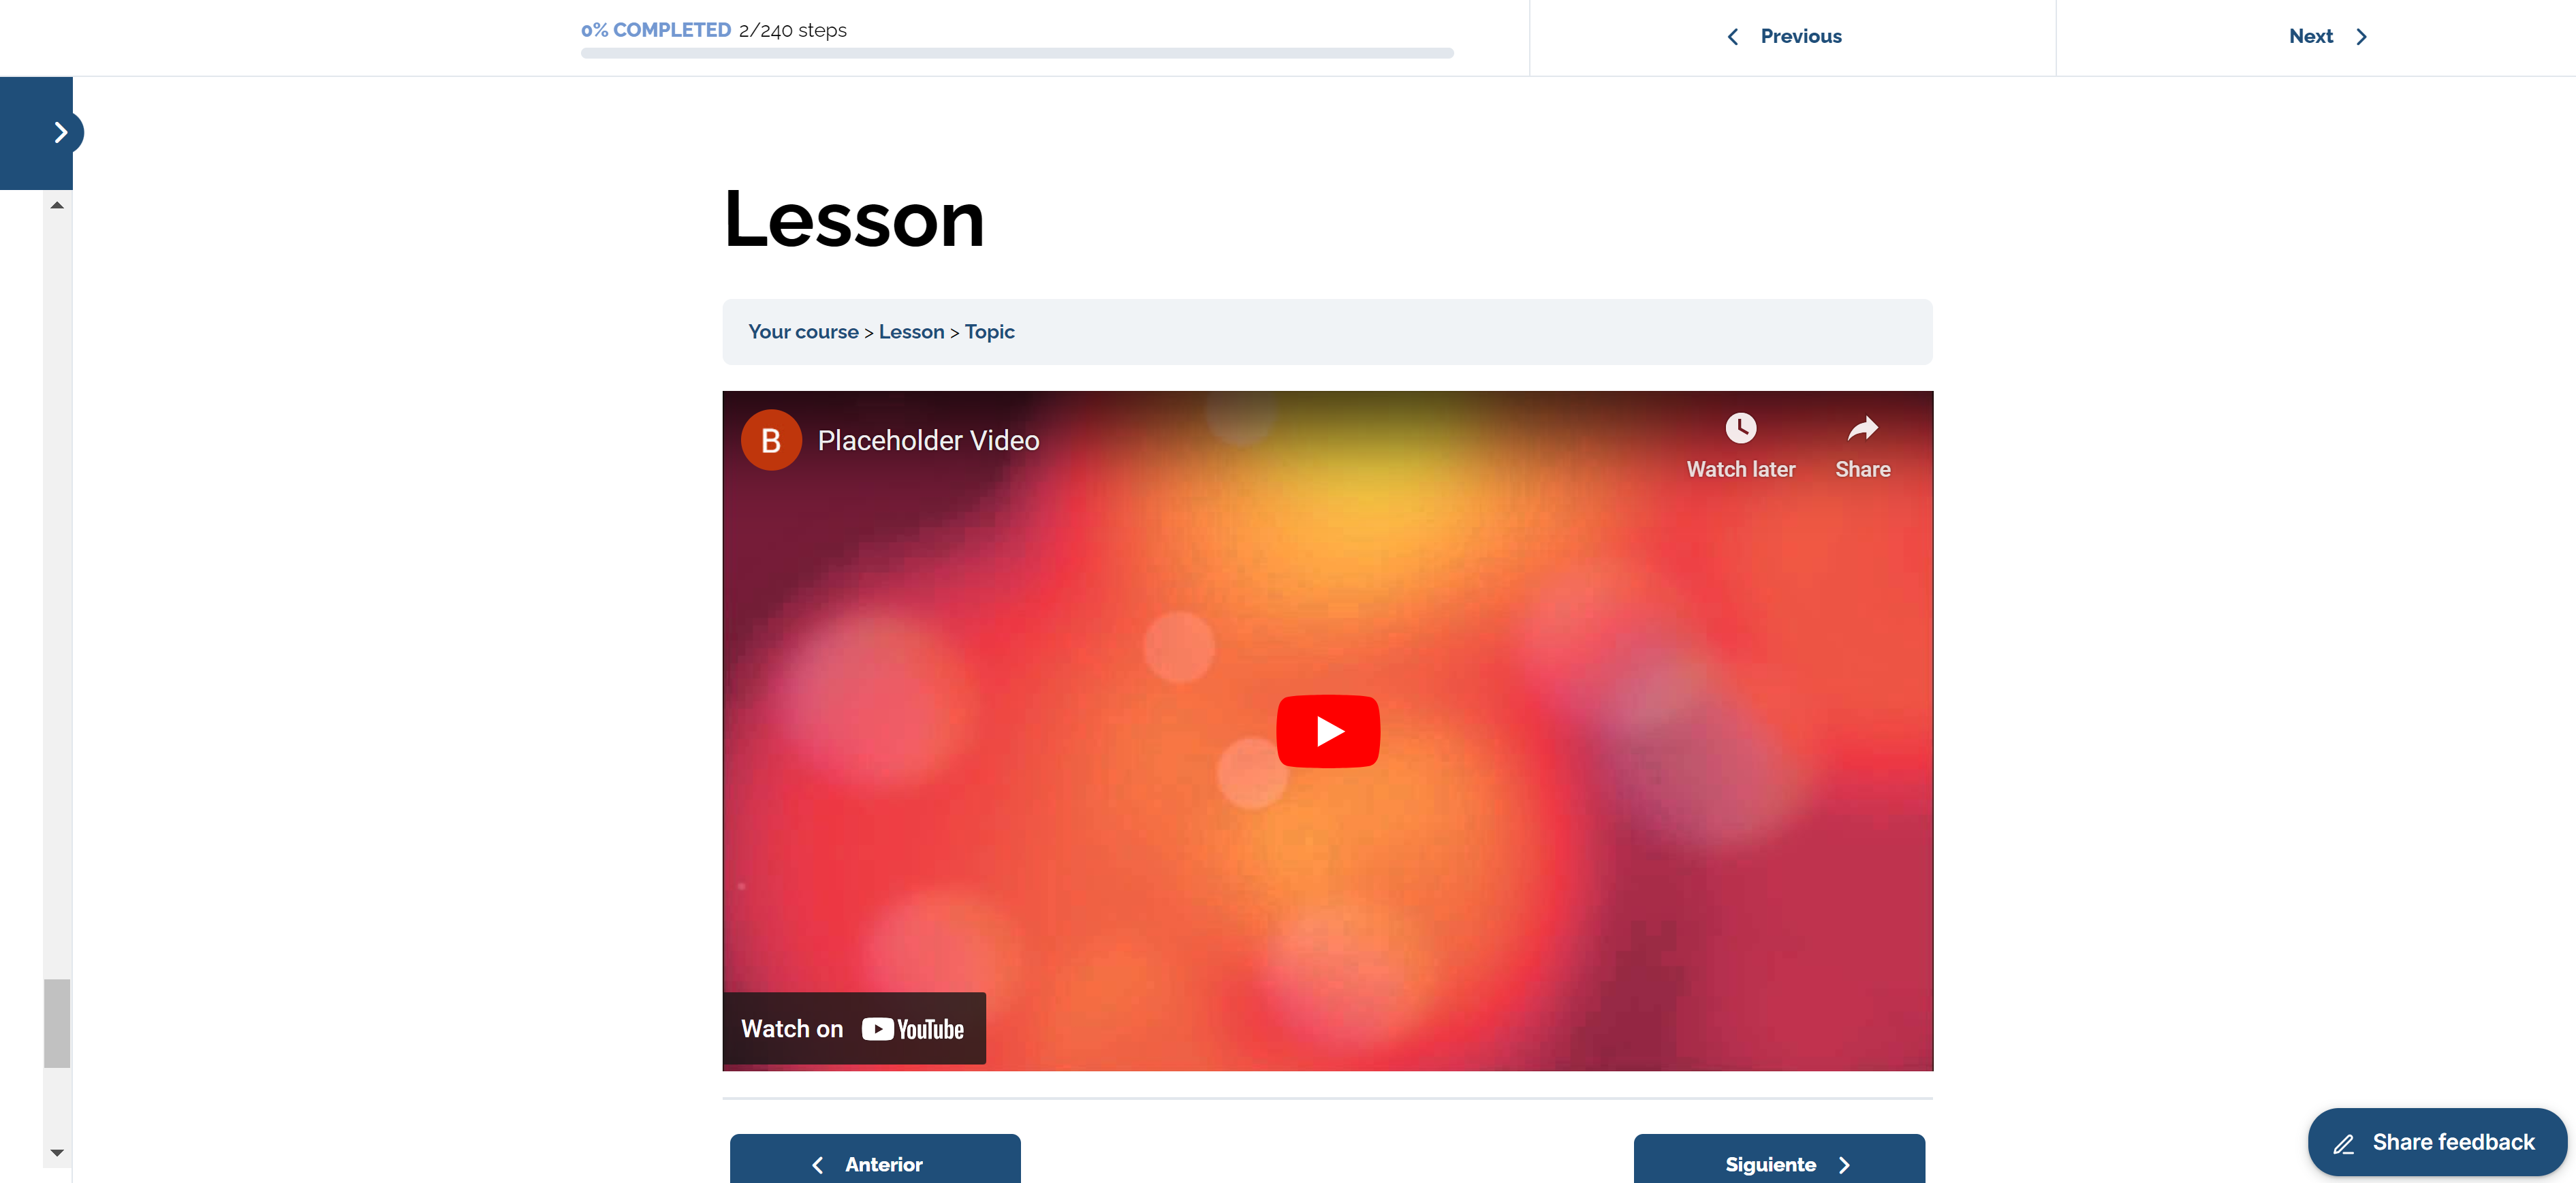
Visit a LearnDash lesson, topic, or quizz in a web browser. Confirm that the feedback button is visible and operational.
Advanced setup: Custom placement
For example, embed PushFeedback at the end of every page:
-
Access the admin dashboard of your LearnDash website by navigating to
http://yourwebsite.com/wp-admin/. -
Go to Appearance > Theme Editor.
-
Add the following code at the end of your theme's
functions.phpfile:function is_learn_dash_fullscreen() {// Check if the current page is a LearnDash lesson, quiz, or topicreturn is_singular(array('sfwd-lessons', 'sfwd-quiz', 'sfwd-topic'));}function enqueue_pushfeedback_scripts_conditionally() {if (is_learn_dash_fullscreen()) {// Add the PushFeedback CSS and JSecho '<link rel="stylesheet" href="https://cdn.jsdelivr.net/npm/pushfeedback/dist/pushfeedback/pushfeedback.css">';echo '<style>:root {--feedback-primary-color: #1f4e79;}</style>';echo '<script type="module" src="https://cdn.jsdelivr.net/npm/pushfeedback/dist/pushfeedback/pushfeedback.esm.js"></script>';}}add_action('wp_head', 'enqueue_pushfeedback_scripts_conditionally');function inject_custom_feedback_widget($content) {static $widget_injected = false;if (is_learn_dash_fullscreen() && !$widget_injected) {$project_id = '<YOUR PROJECT ID>'; // Replace with your actual project ID$widget_html = '<div class="feedback-widget"><p><b>Was this helpful?</b></p><span class="feedback-widget-positive"><feedback-buttonproject="' . $project_id . '"button-style="dark"modal-position="bottom-right"button-position="default"><button class="button button--outline button--dark button--sm" title="Yes">👍</button></feedback-button></span><span class="feedback-widget-negative margin-left--sm"><feedback-buttonproject="' . $project_id . '"button-style="dark"modal-position="bottom-right"button-position="default"><button class="button button--outline button--dark button--sm" title="No">👎</button></feedback-button></span></div>';$widget_injected = true;return $content . $widget_html;}return $content;}add_filter('the_content', 'inject_custom_feedback_widget');Replace
<YOUR_PROJECT_ID>with your project's ID from the PushFeedback dashboard. -
Save your changes.
-
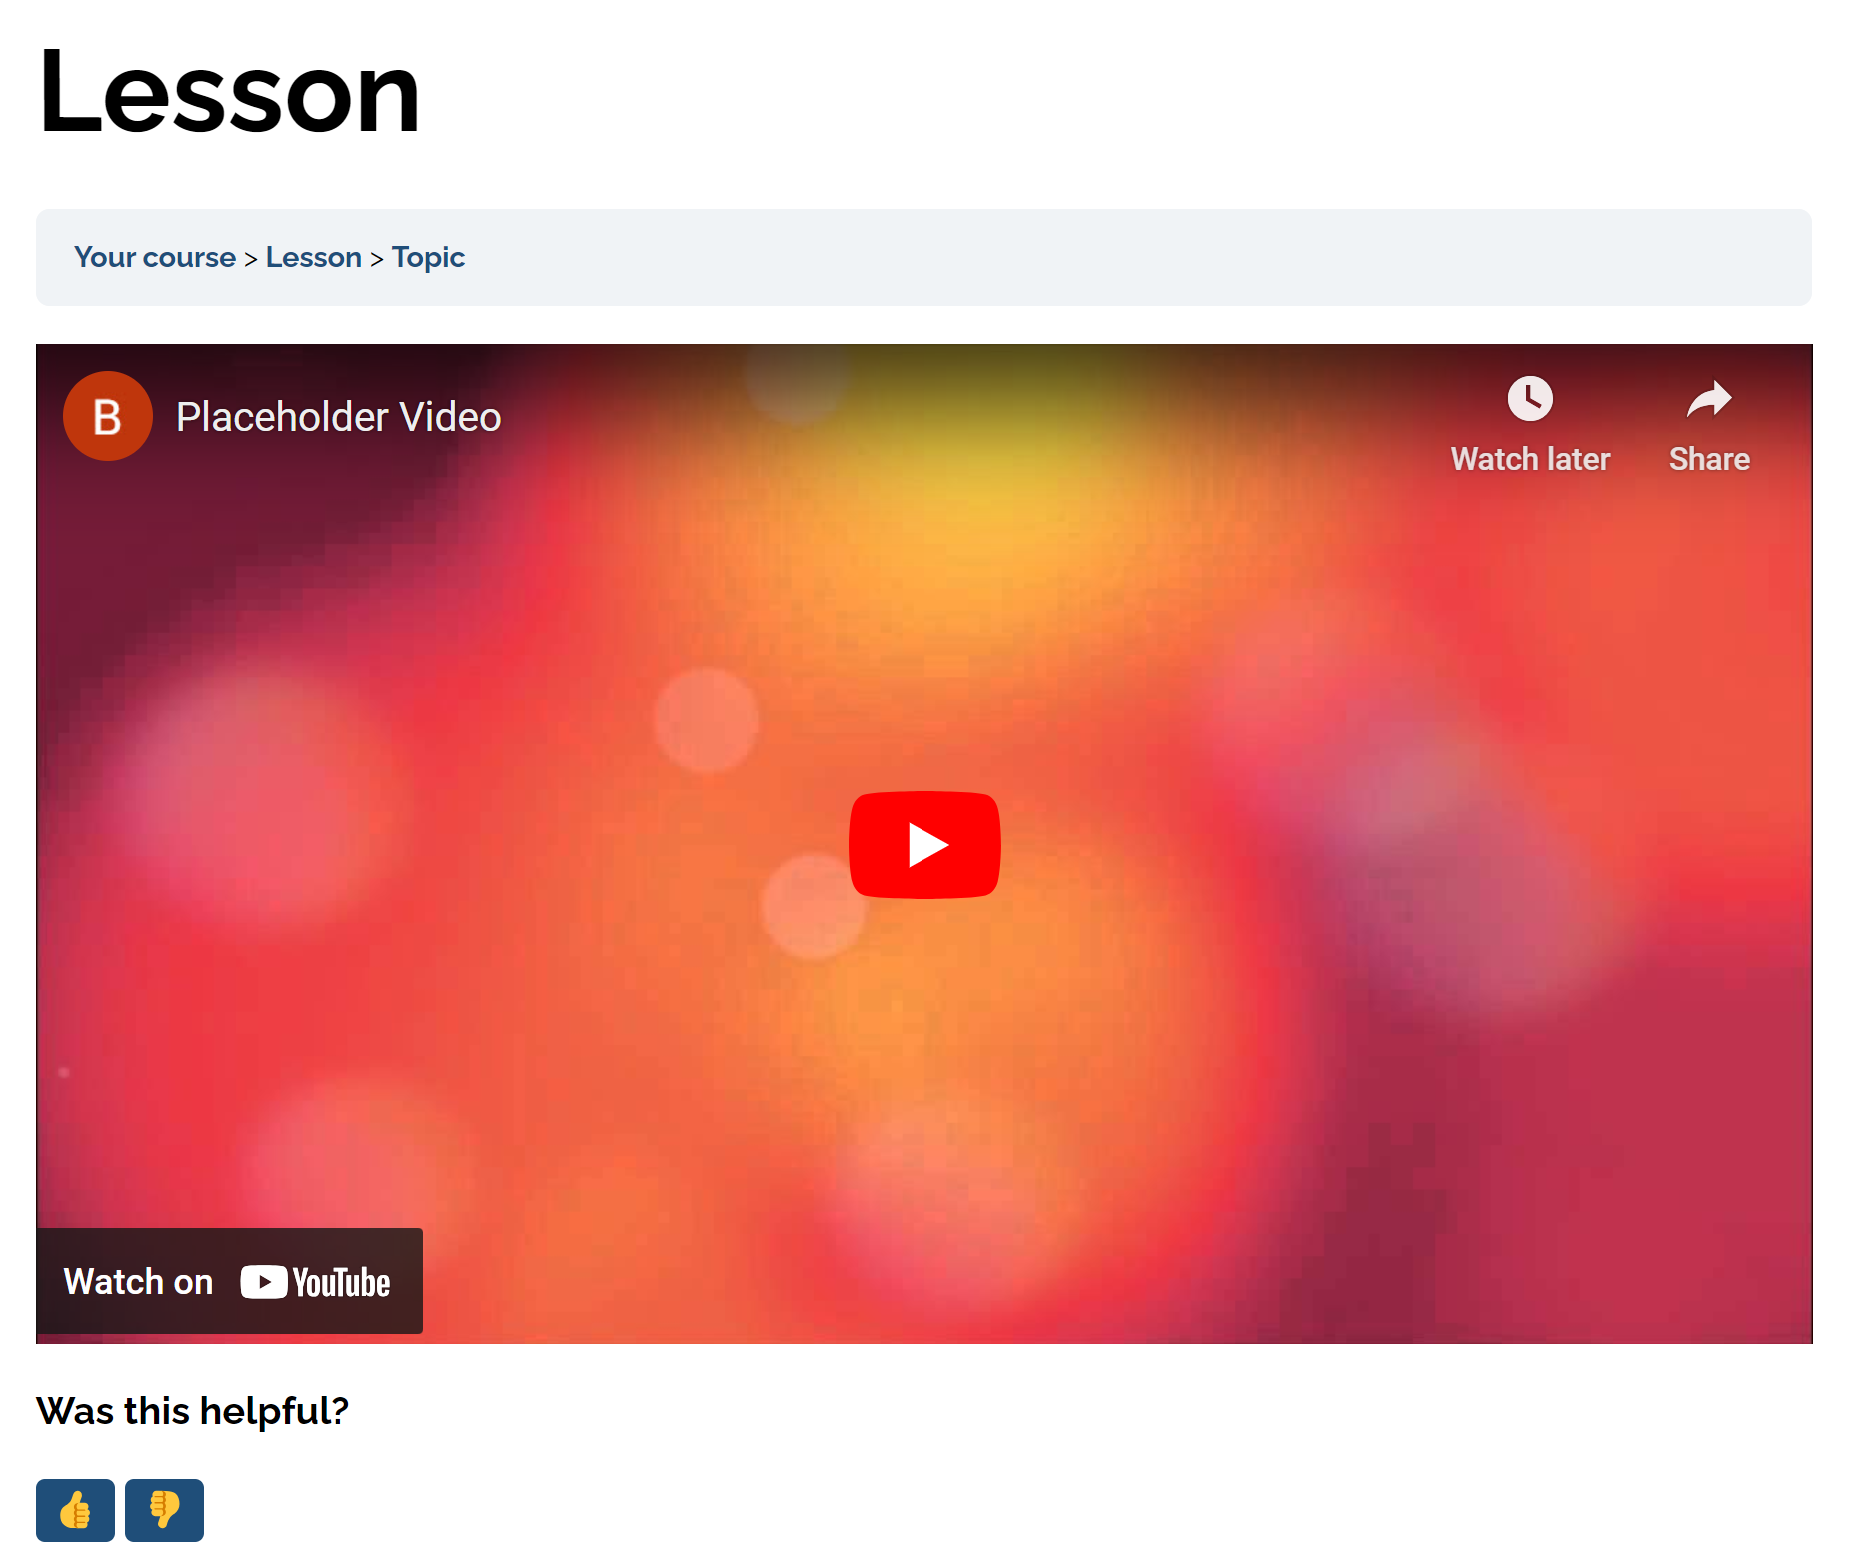
Visit a LearnDash lesson, topic, or quizz in a web browser. Confirm that the feedback button is visible and operational.
Next steps
Choose what to do next:
- Customization — Adjust the widget's layout, styles, and text.
- Integrations — Forward feedback to Slack, email, Jira, and more.