Feedback widget for Wordpress
PushFeedback collects user feedback directly from your website. This guide covers installation in a WordPress site.
Prerequisites
- A PushFeedback account. If you don't have one, sign up for free.
- A project created in your PushFeedback dashboard. If you haven't created one yet, follow the steps in the Quickstart guide.
- A Wordpress website.
Installation
-
Access the admin dashboard of your WordPress website by navigating to
http://yourwebsite.com/wp-admin/. -
Add the PushFeedback styles and scripts:
-
Navigate to Appearance > Theme Editor.
-
From the right sidebar, select the
header.phpfile to edit the head section. -
Insert the following code within the head section:
<!-- Initialize the PushFeedback widget --><link rel="stylesheet" href="https://cdn.jsdelivr.net/npm/pushfeedback/dist/pushfeedback/pushfeedback.css"><script type="module" src="https://cdn.jsdelivr.net/npm/pushfeedback/dist/pushfeedback/pushfeedback.esm.js"></script>
-
-
To insert the feedback button just before the body tag:
-
While still in the Theme Editor, locate and click on the
footer.phpfile from the right sidebar. -
Just before the body tag, paste the following snippet:
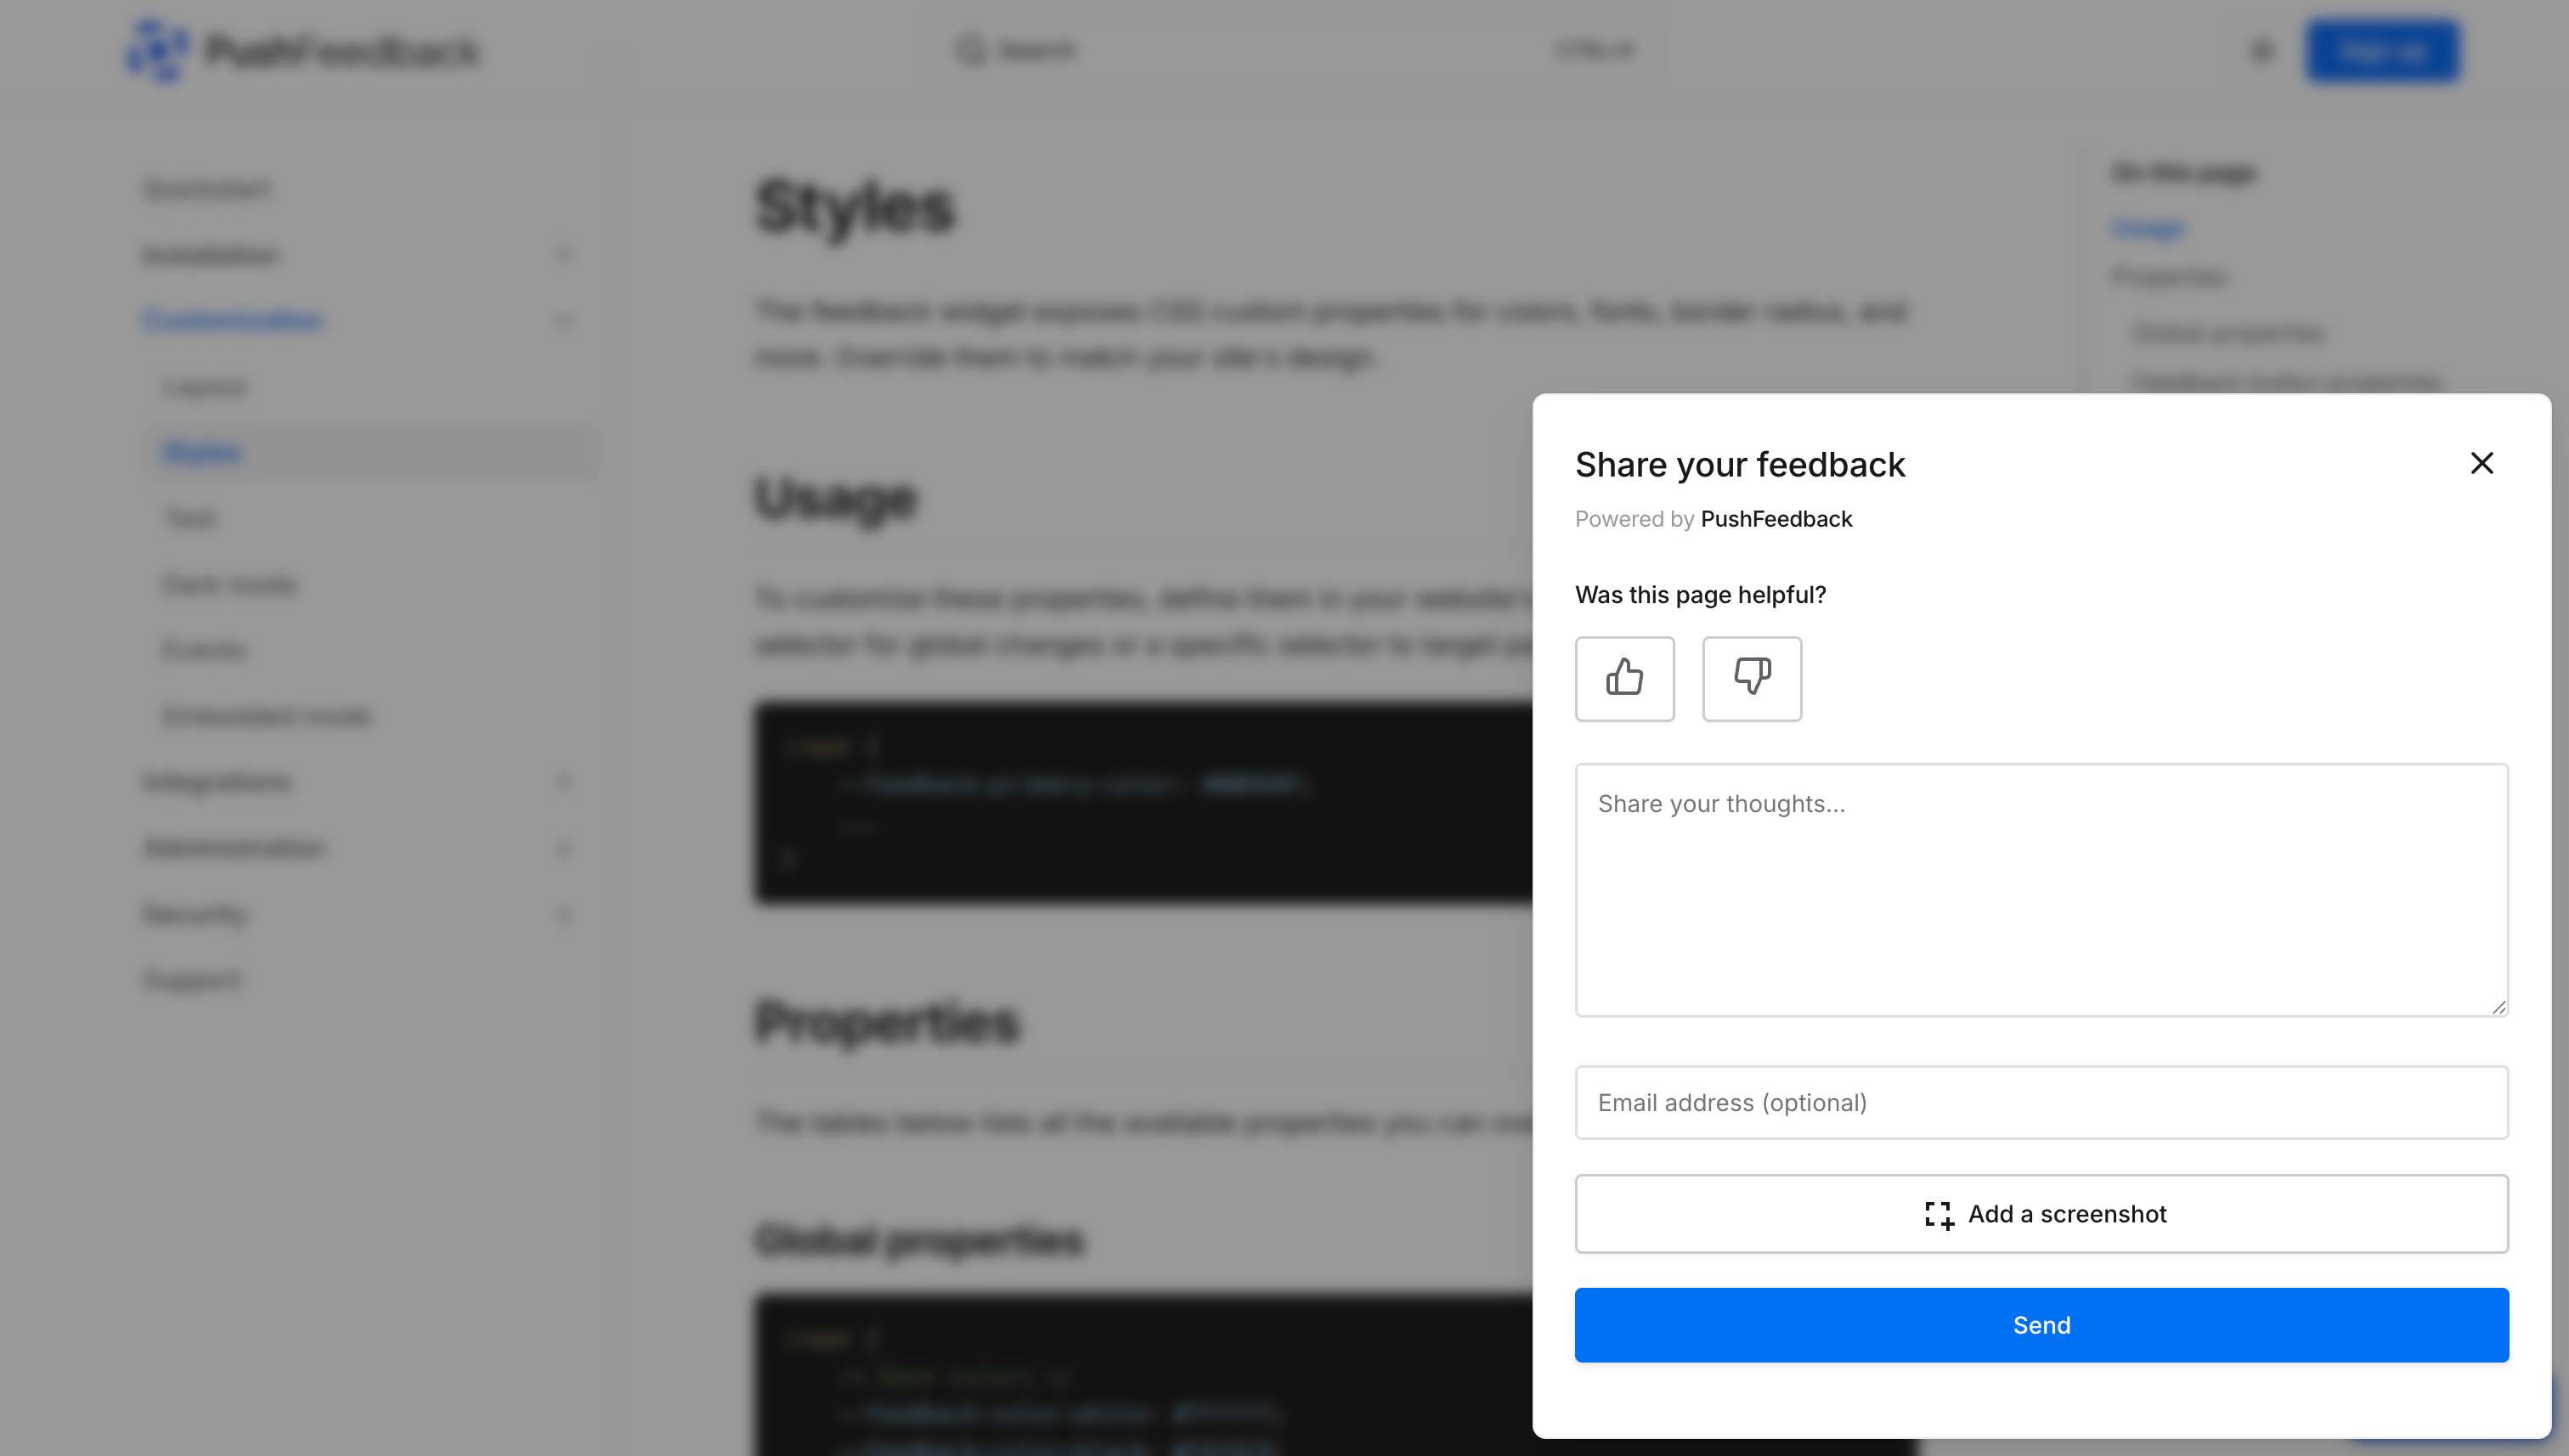
<feedback-button project="<YOUR_PROJECT_ID>" button-position="bottom-right" modal-position="bottom-right" button-style="dark">Feedback</feedback-button>Replace
<YOUR_PROJECT_ID>with your project's ID from the PushFeedback dashboard.
-
-
Once you've saved your changes, visit your WordPress website in a web browser. Confirm that the feedback button is visible and operational.
Next steps
Choose what to do next:
- Customization — Adjust the widget's layout, styles, and text.
- Integrations — Forward feedback to Slack, email, Jira, and more.